
How to Set Up a DMARC Record at FORPSI
Prerequisites
You need an active DNS hosting at FORPSI and access to the admin panel. DMARC builds on SPF and DKIM — before setting it up, you should have at least an SPF record in place (guide for FORPSI). If you're unfamiliar with DMARC, read What is DMARC and Why Do You Need It.
Step 1: Log in to the admin panel
Open admin.forpsi.com and log in. You will see the Account administration page with an overview of your services. In the left menu under Services administration, click DNS hosting.
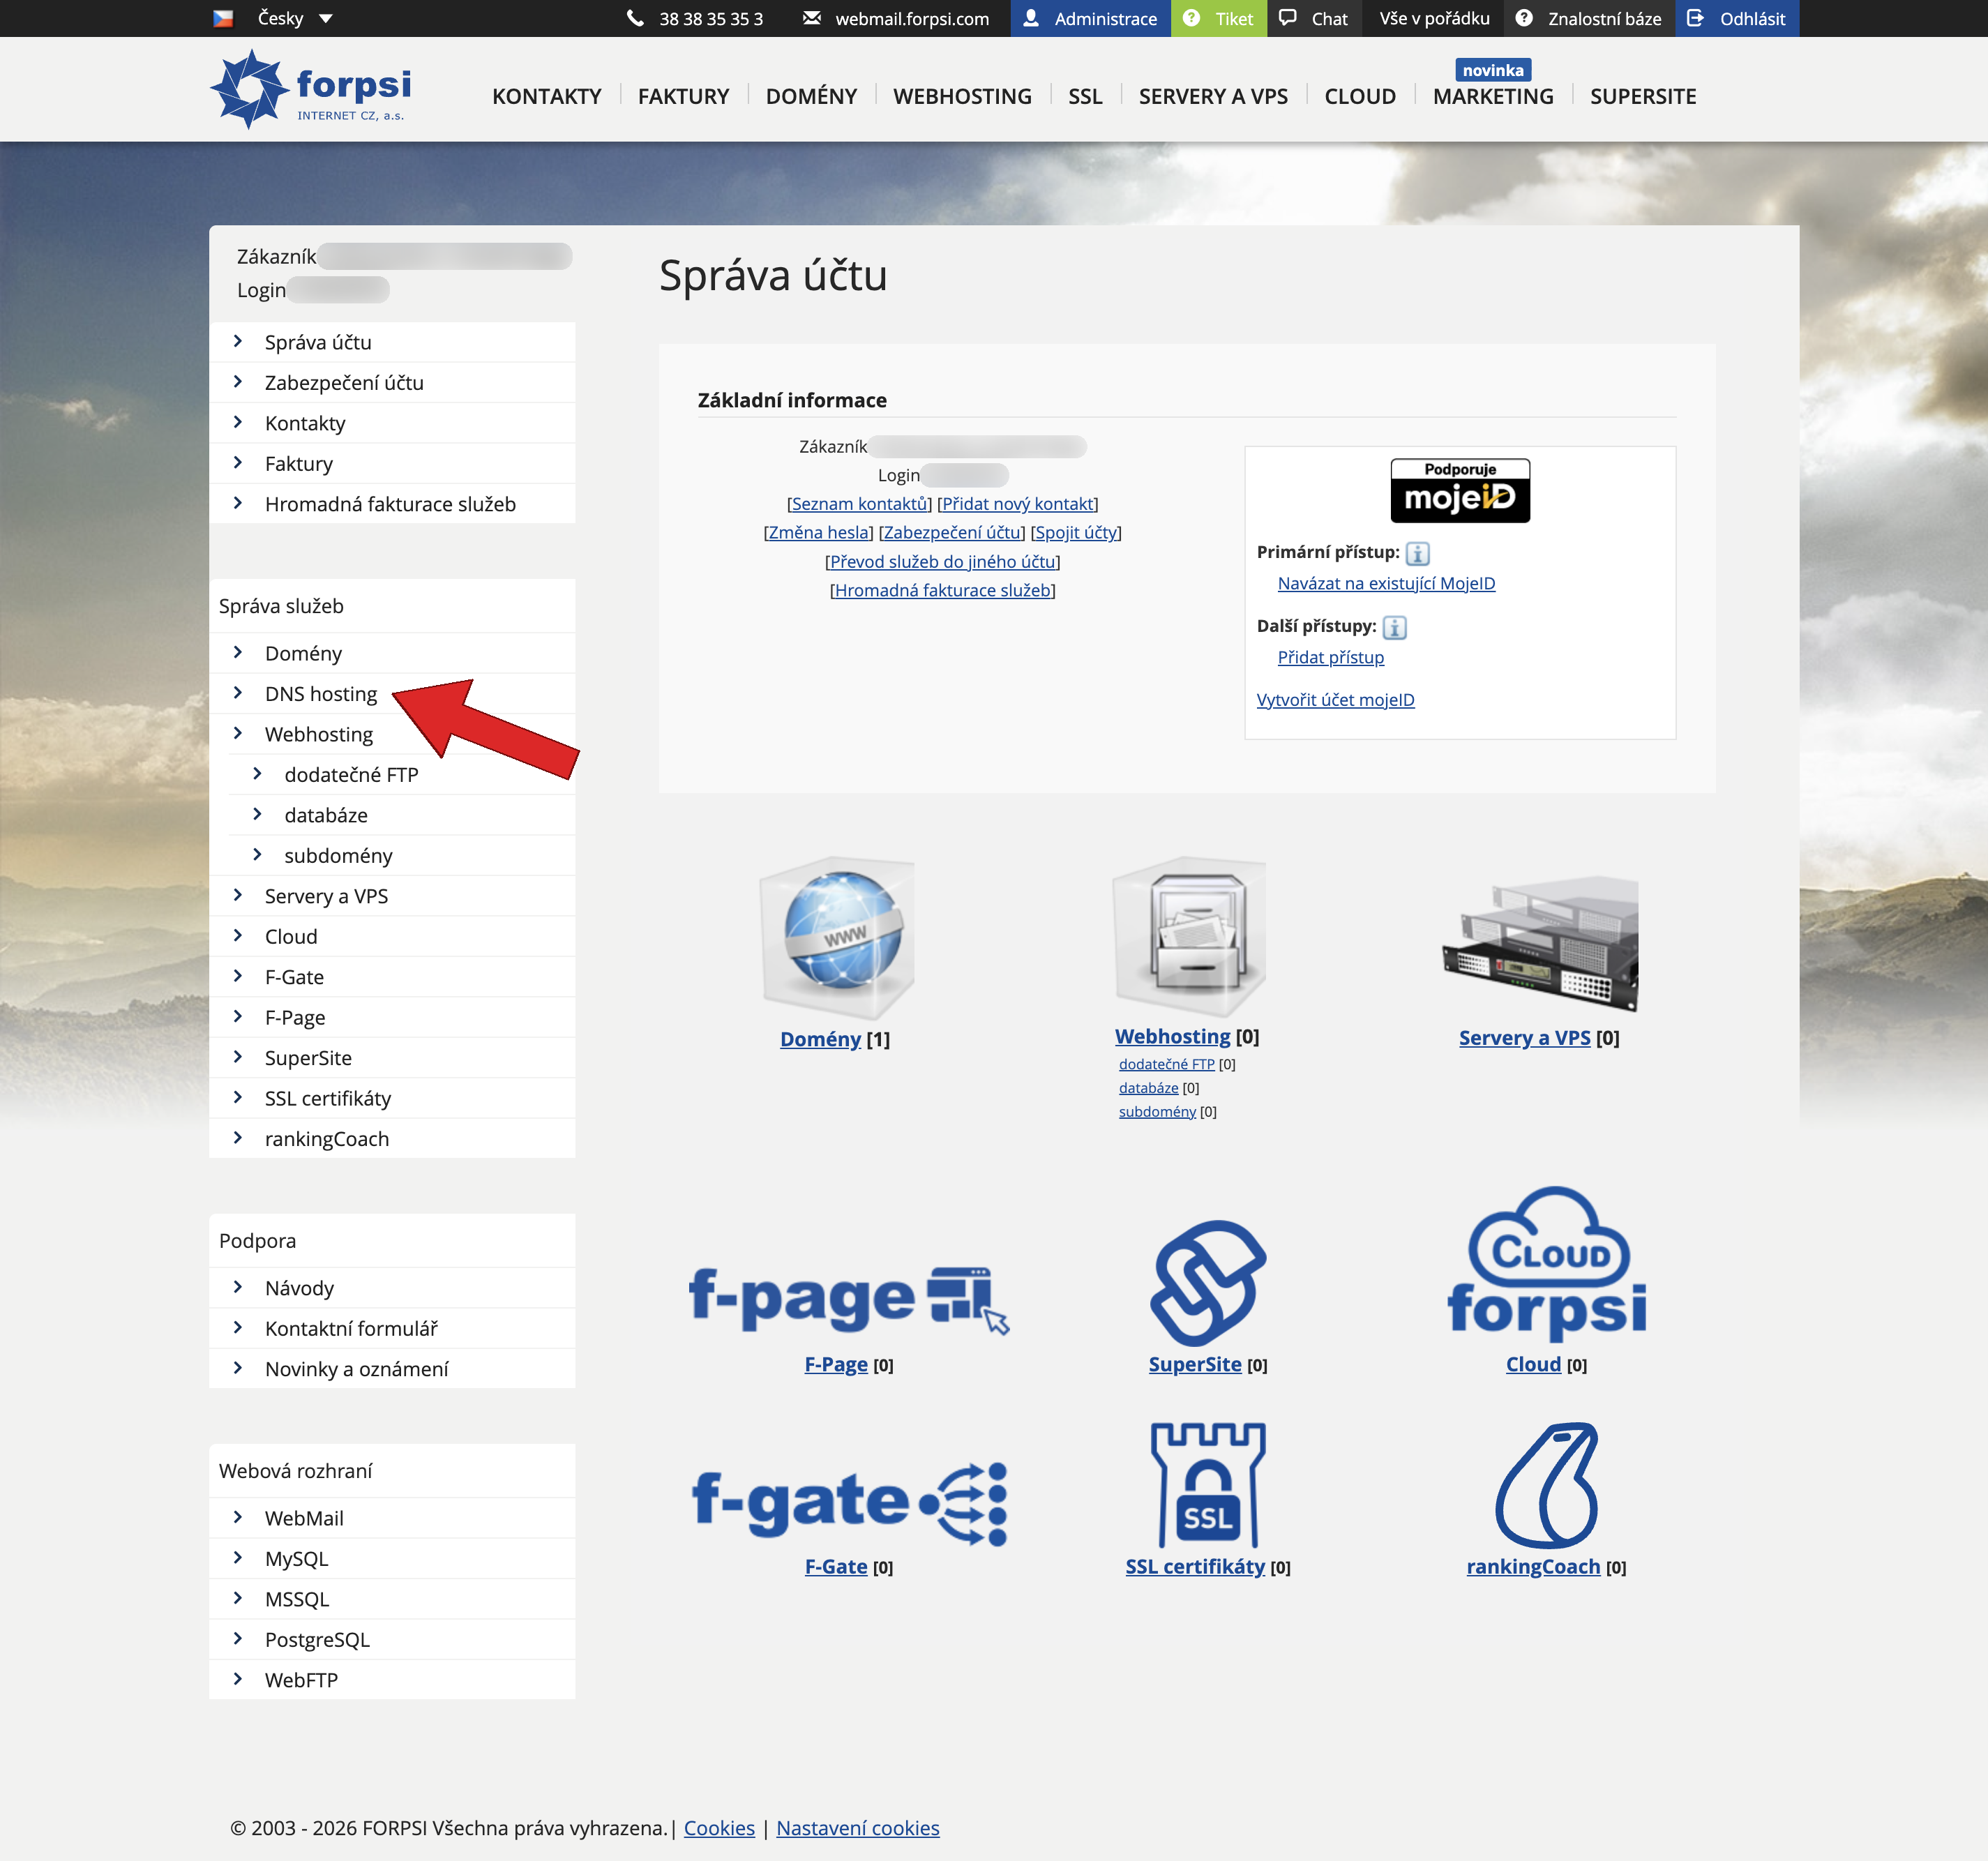 Source: https://admin.forpsi.com/
Step 2: Select your domain
On the DNS hosting page, click the order number next to the domain you want to add the DMARC record to.
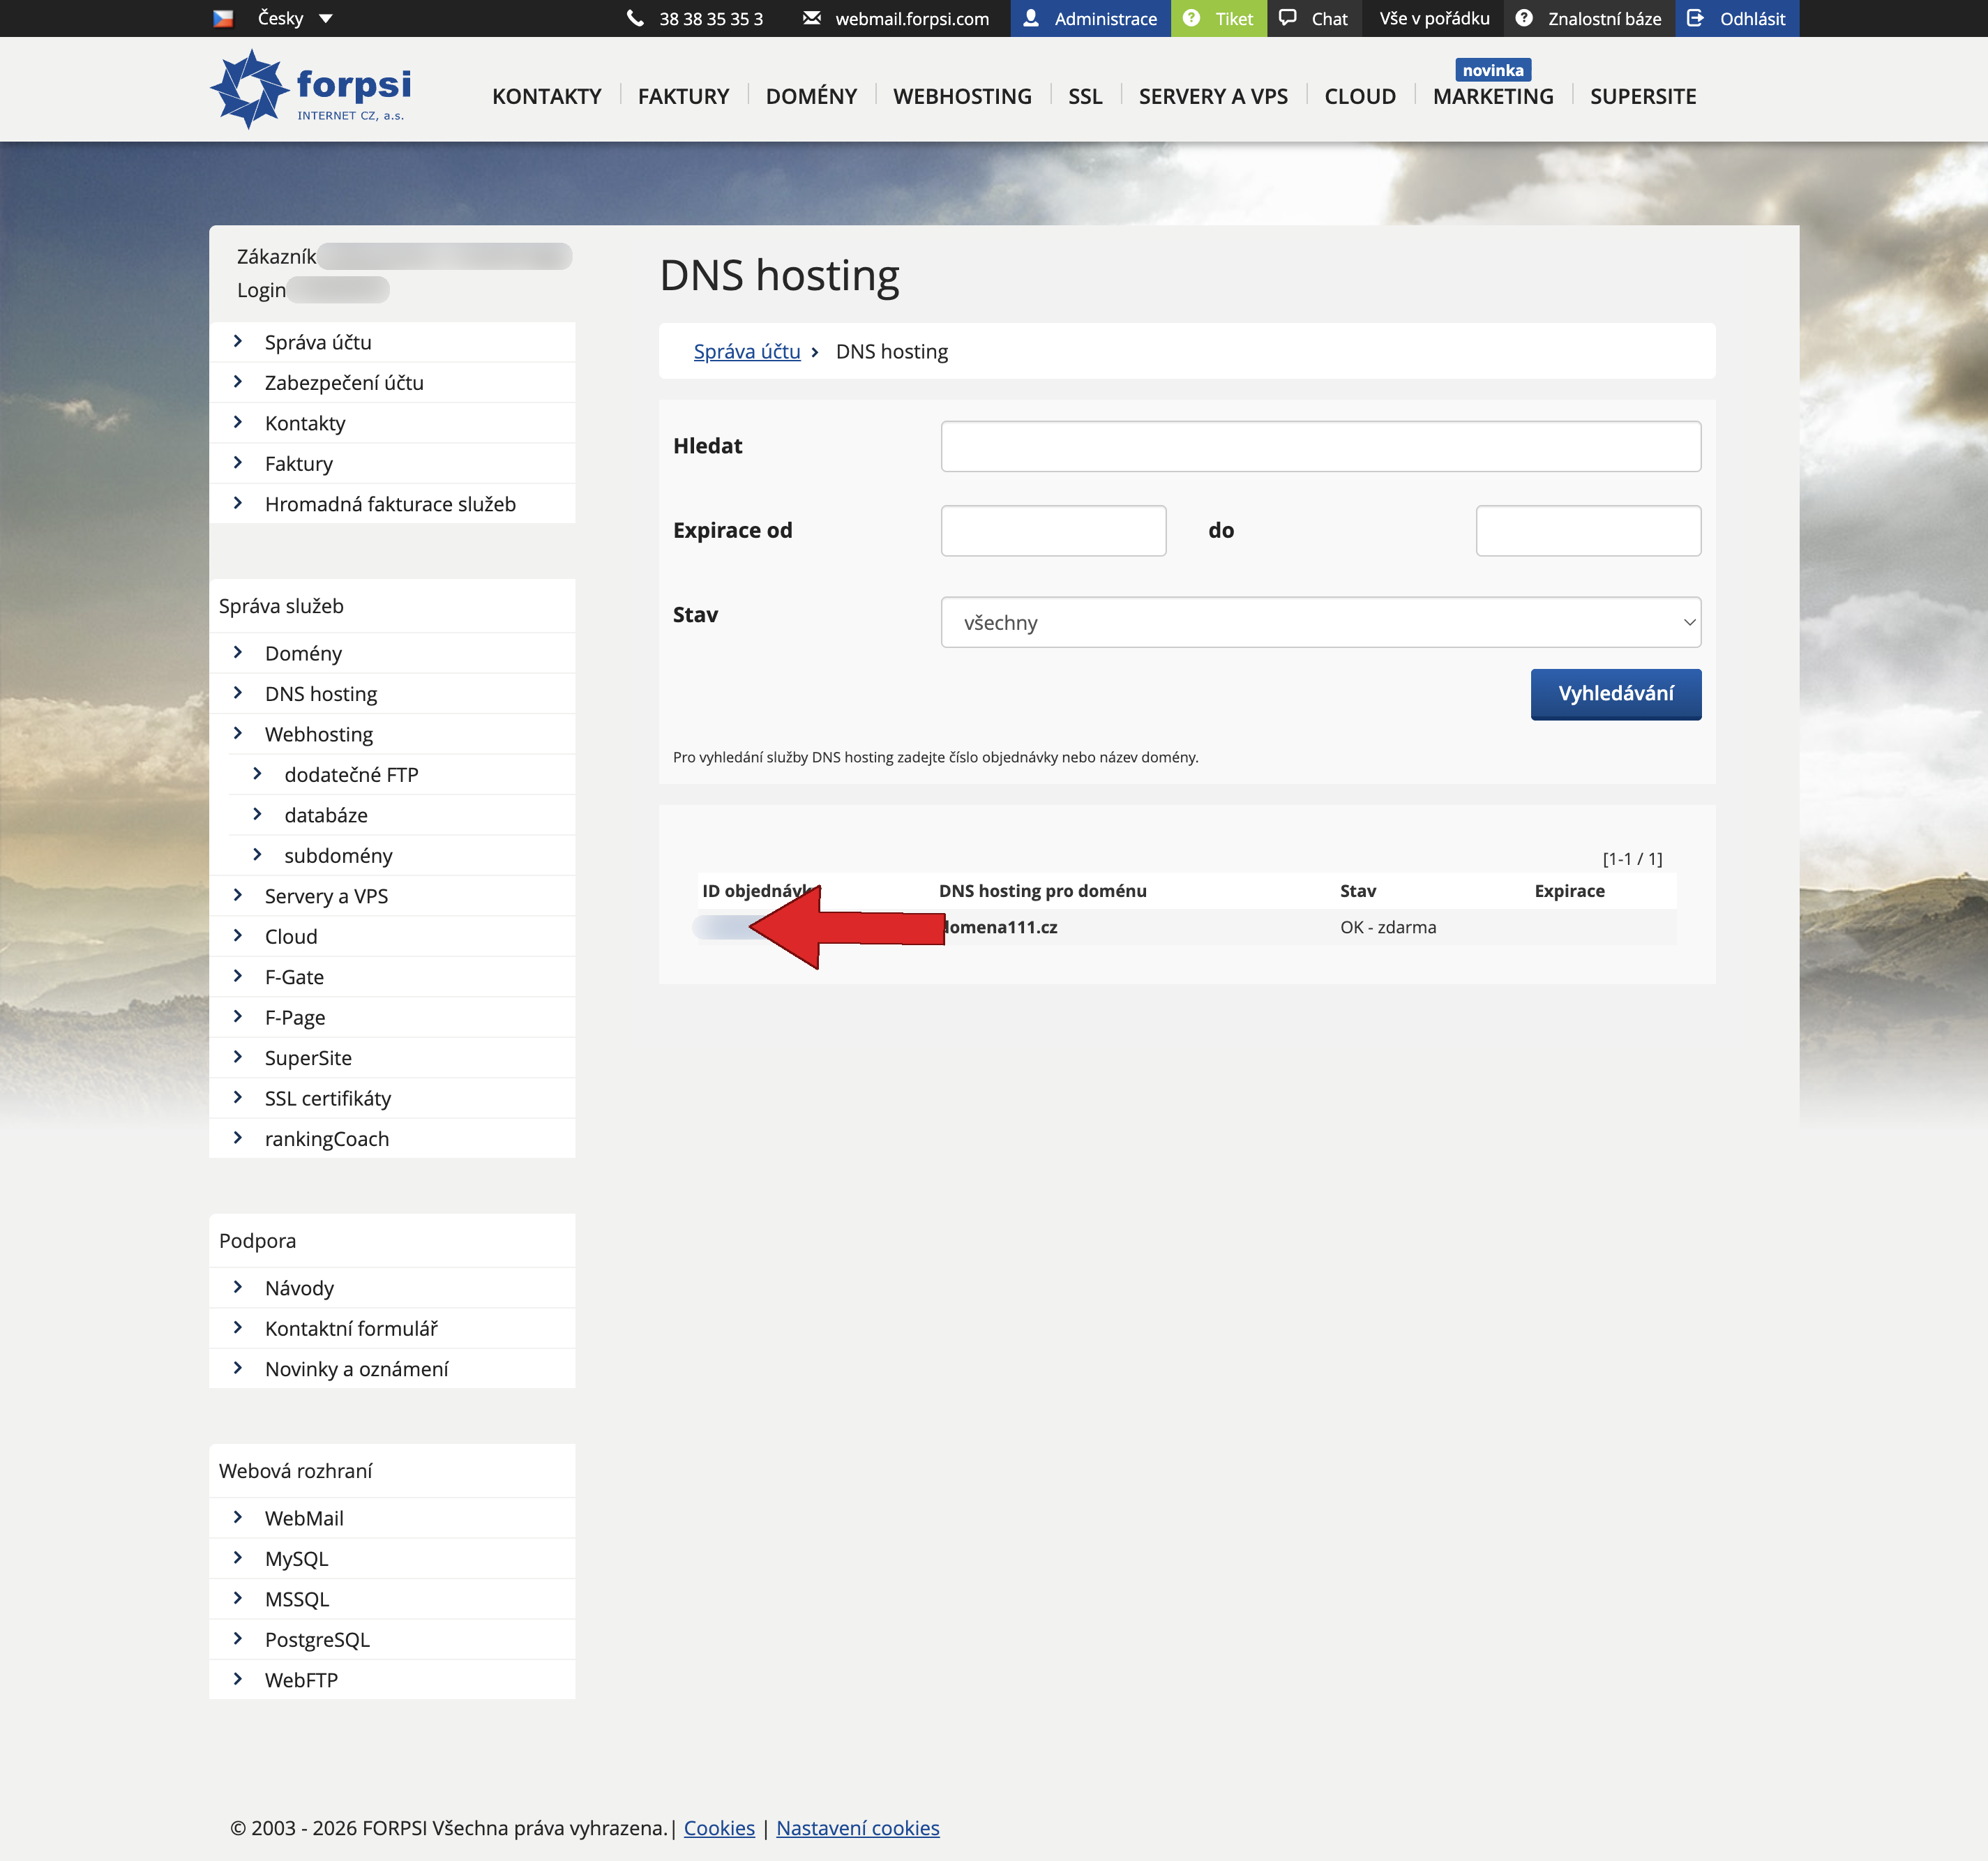 Source: https://admin.forpsi.com/domain-dns/dns-list.php
Step 3: Go to DNS record editing
On the DNS hosting service detail page, click the Edit DNS records link next to Primary DNS.
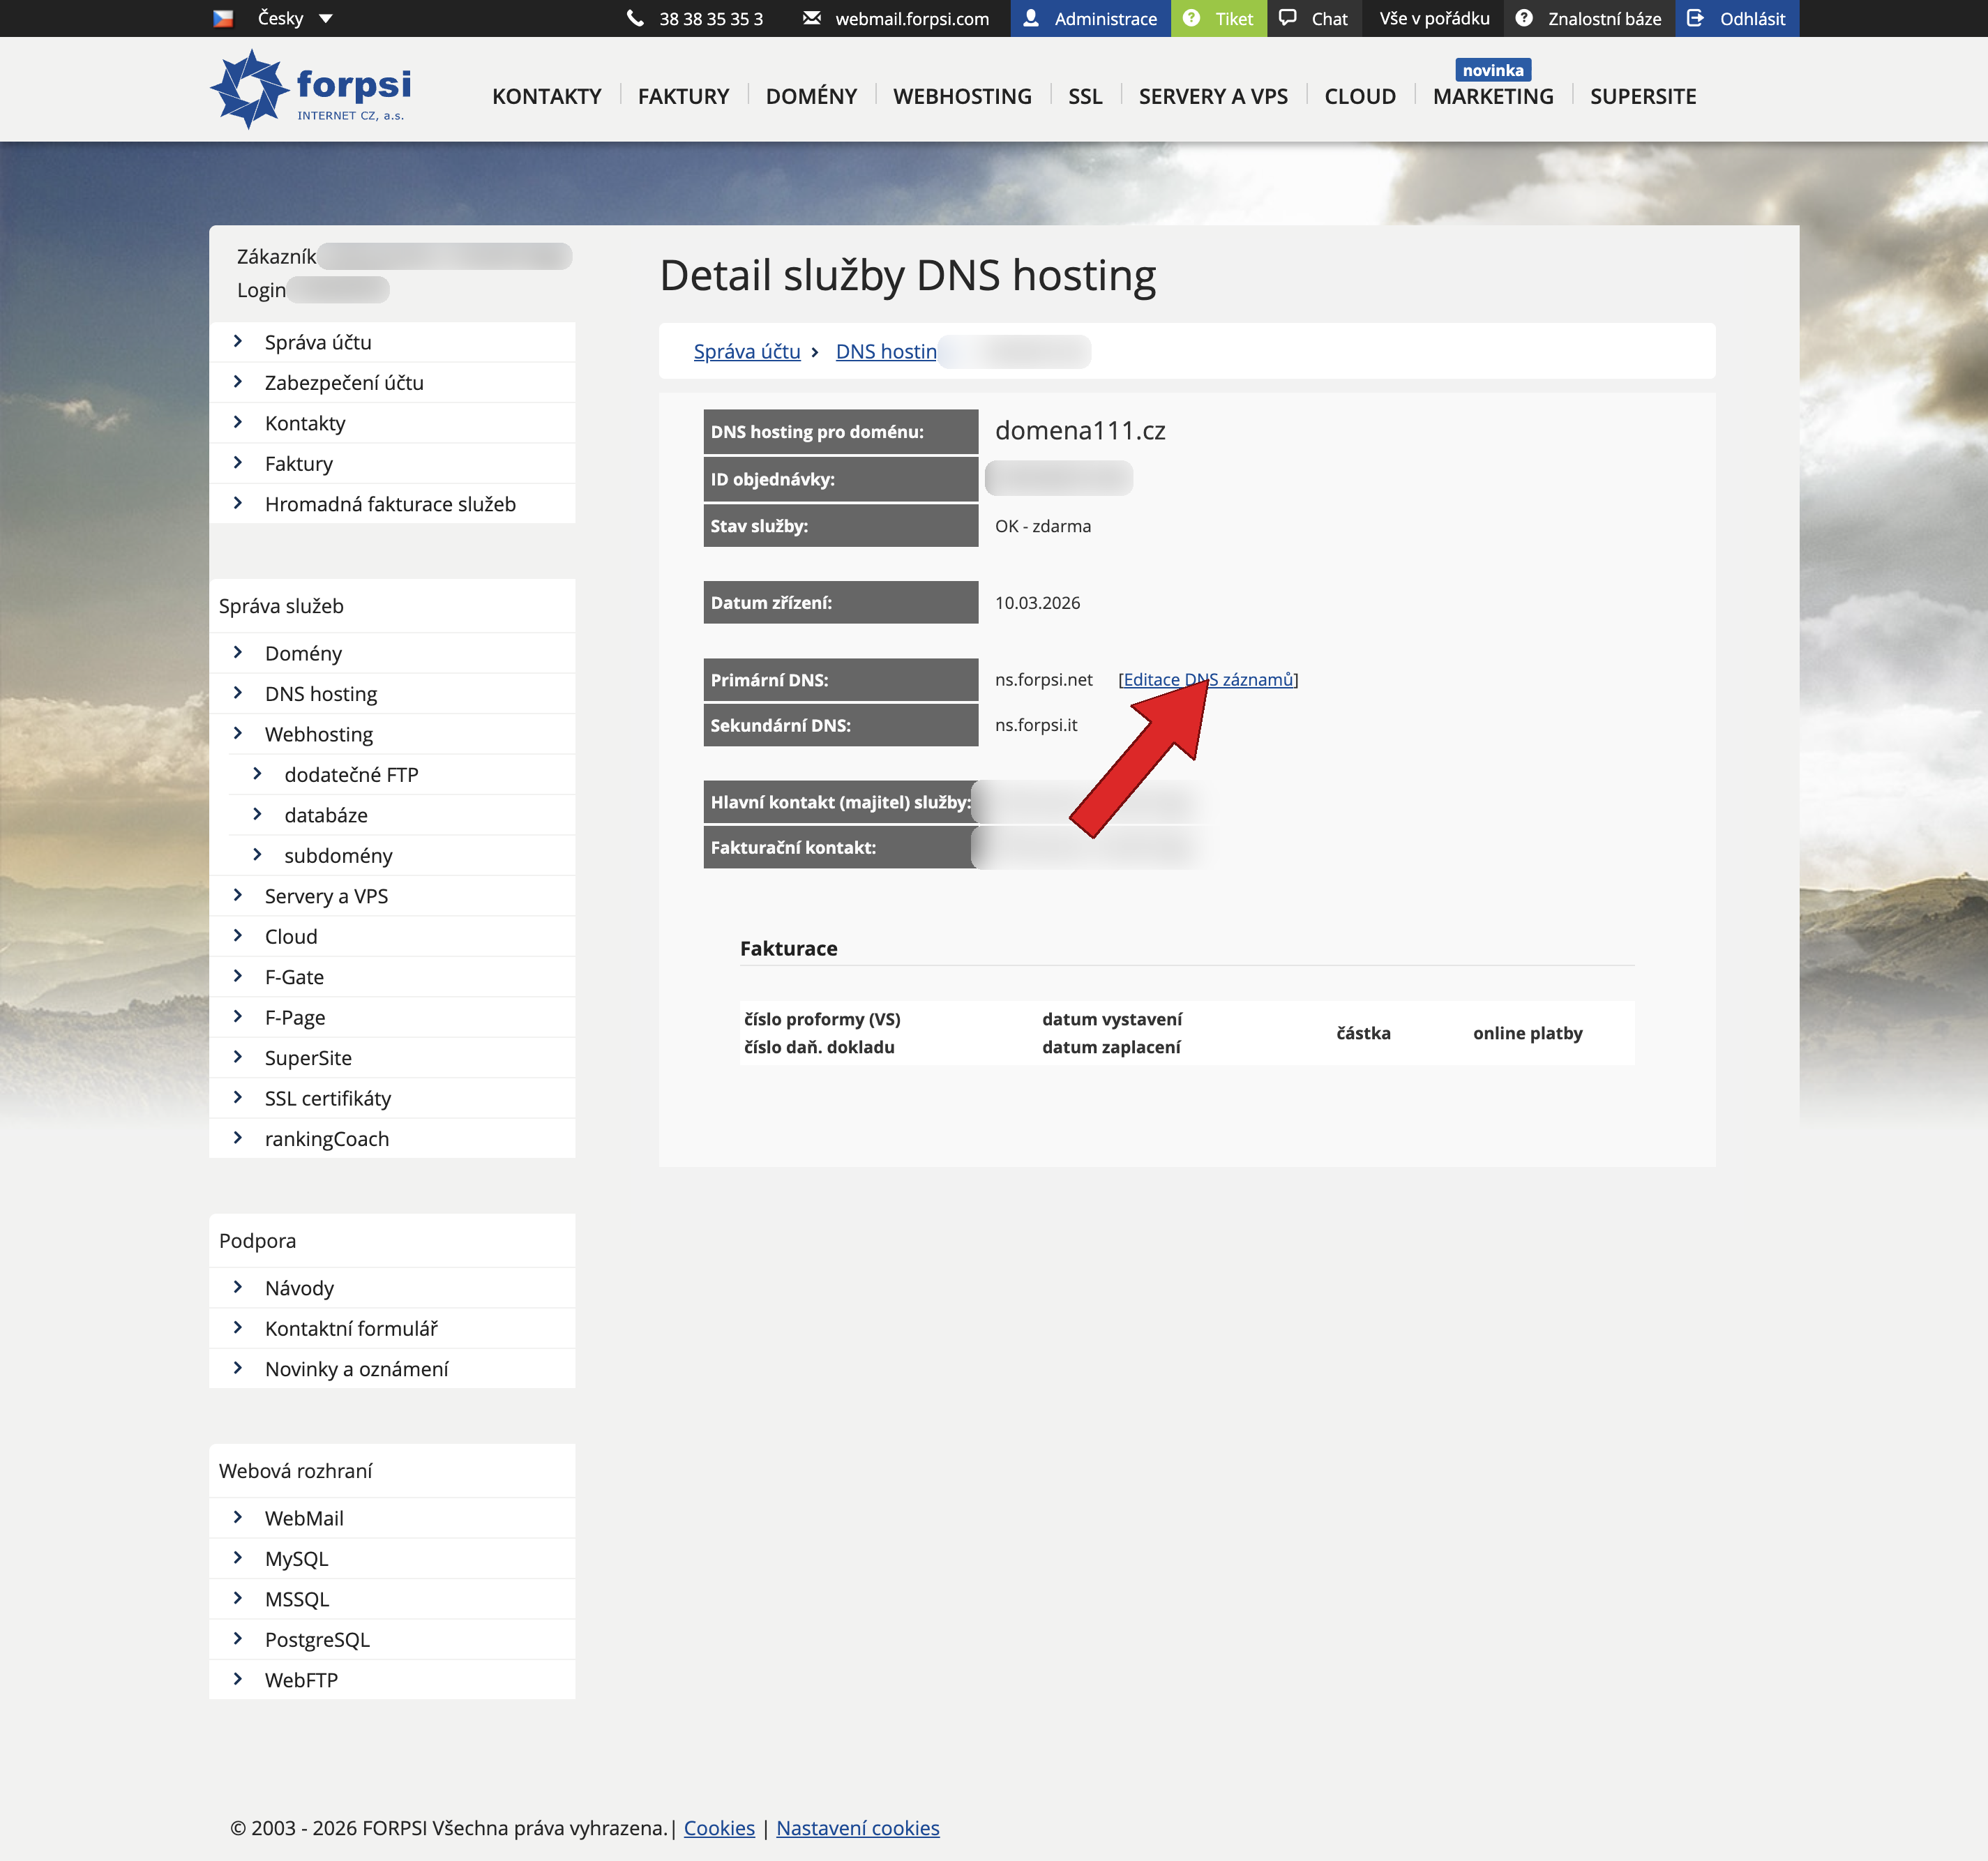 Source: https://admin.forpsi.com/domain-dns/dns-detail.php?id={id}
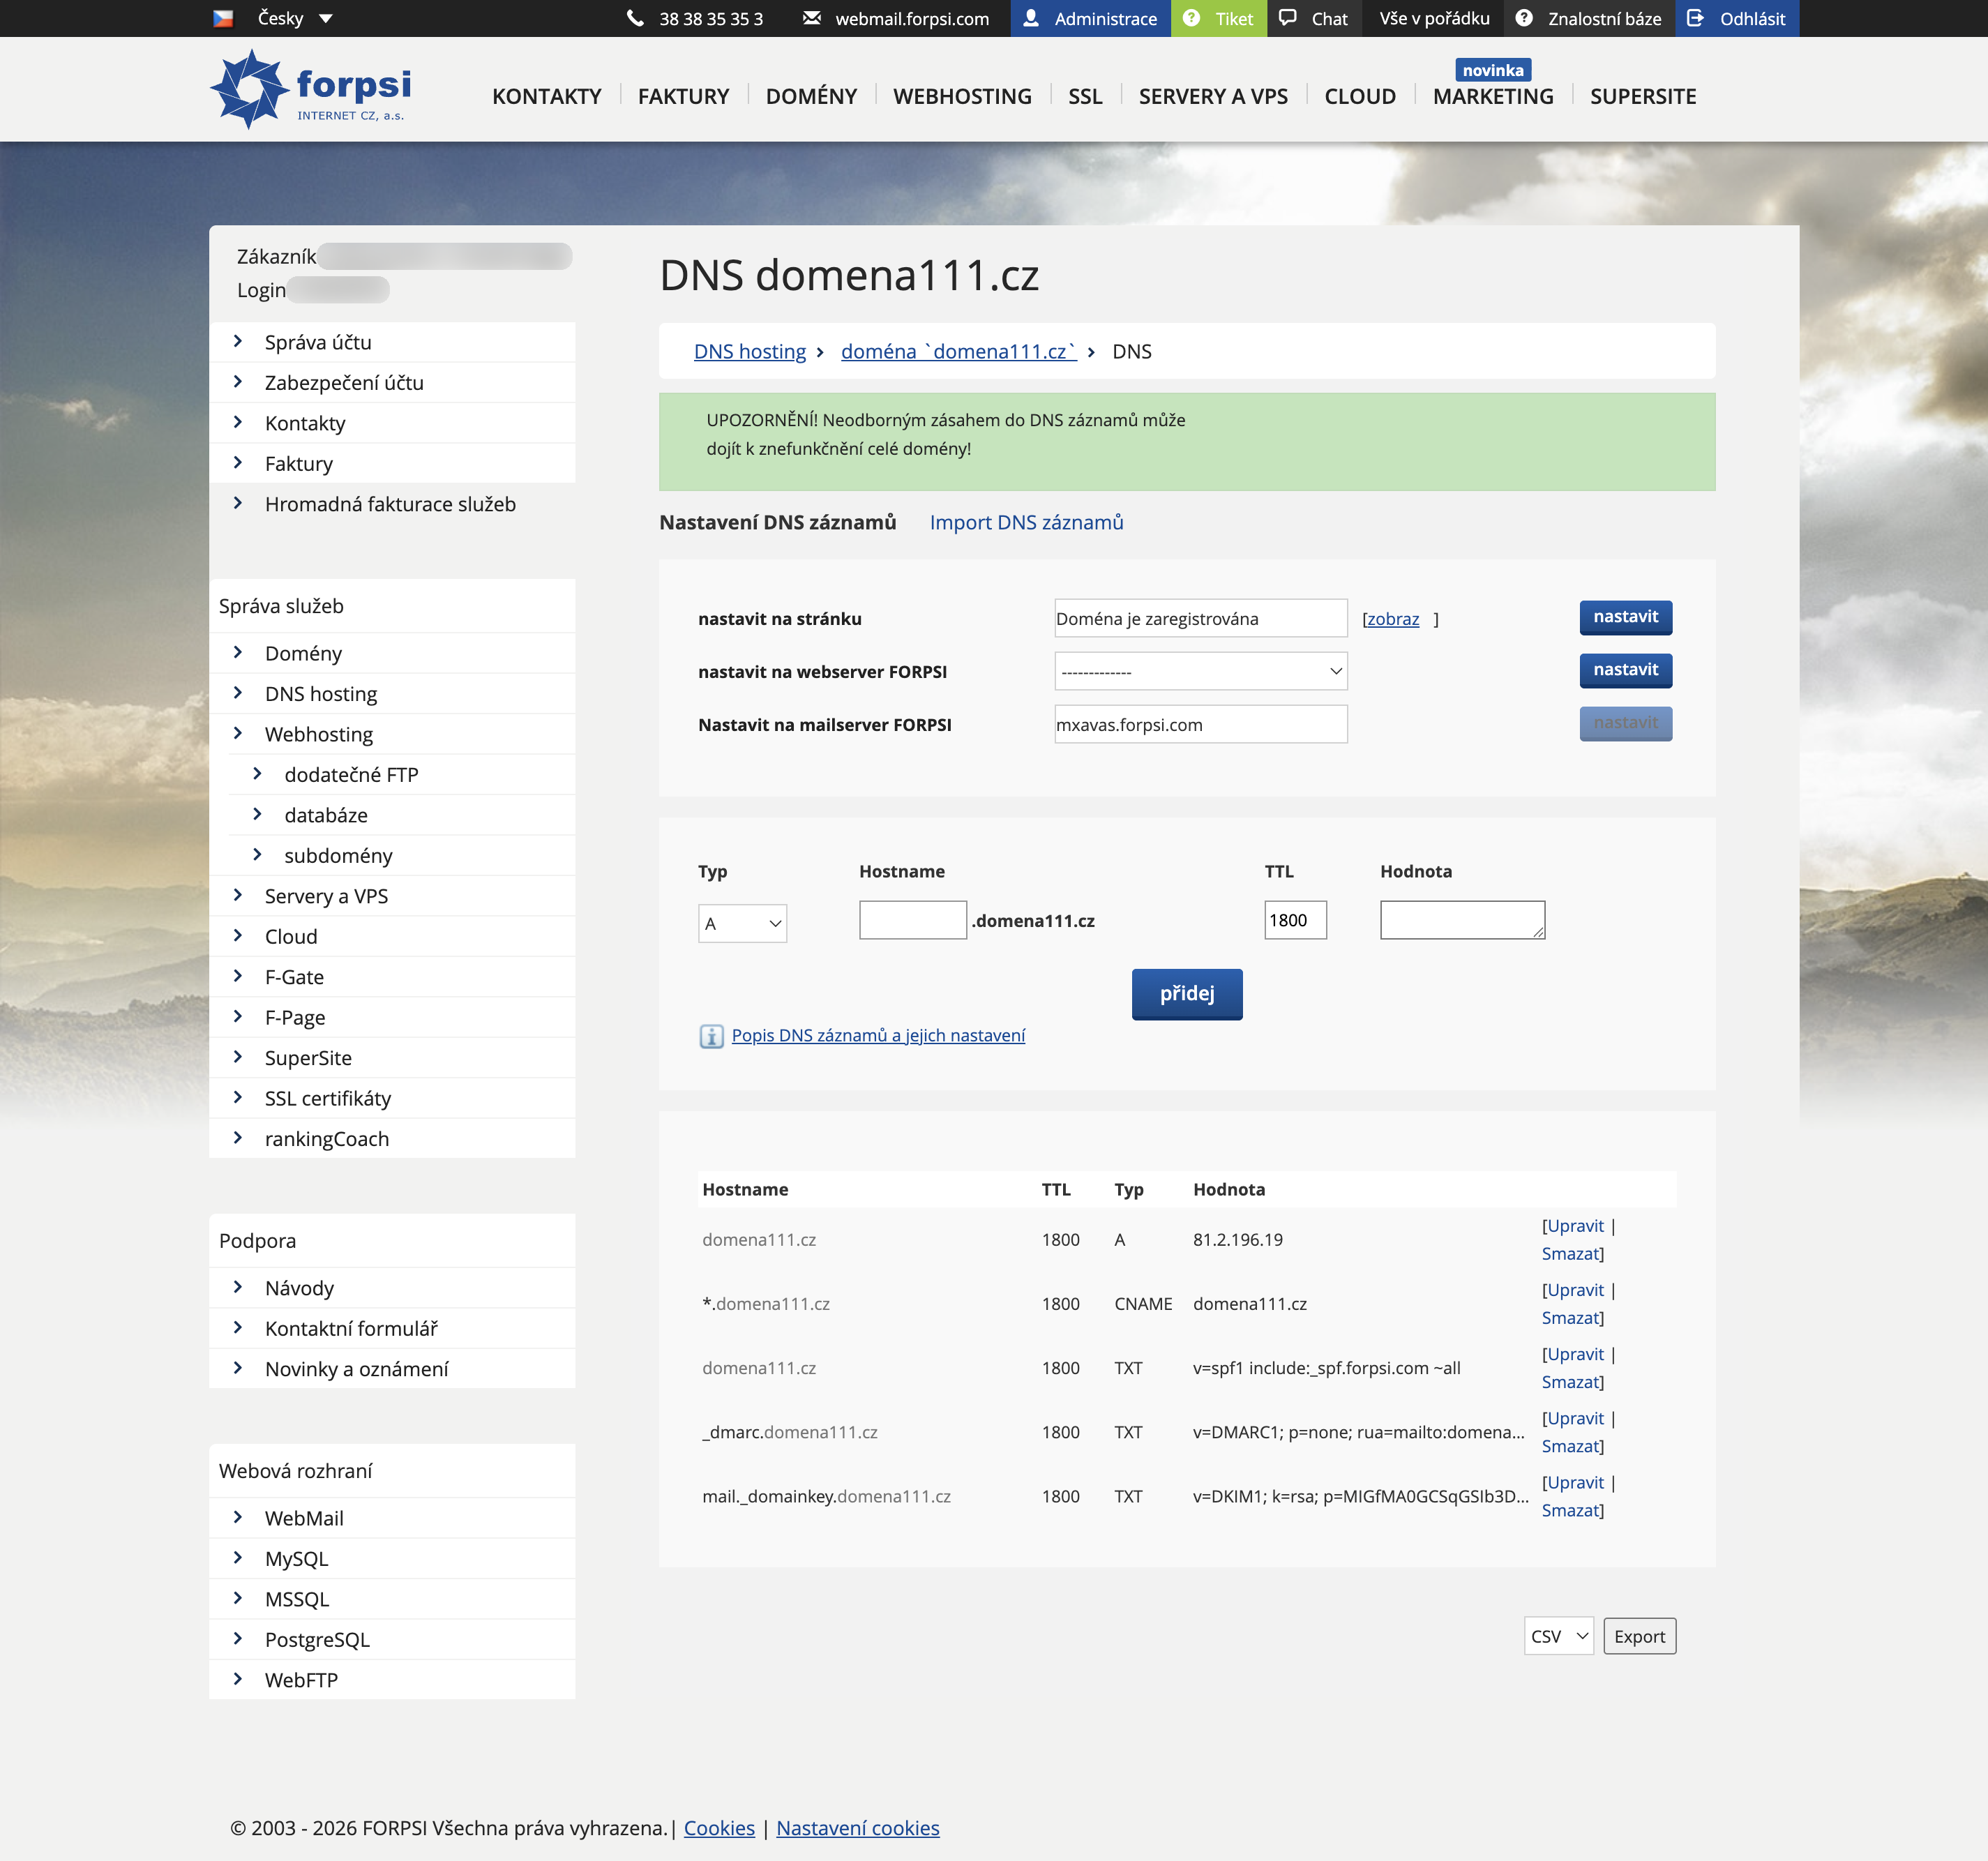
You will see a form for adding new records and a table of existing ones.
 Source: https://admin.forpsi.com/domain-dns/dns-edit.php?id={id}
Check that there is no TXT record with host name _dmarc in the table — a domain must have only one DMARC record.
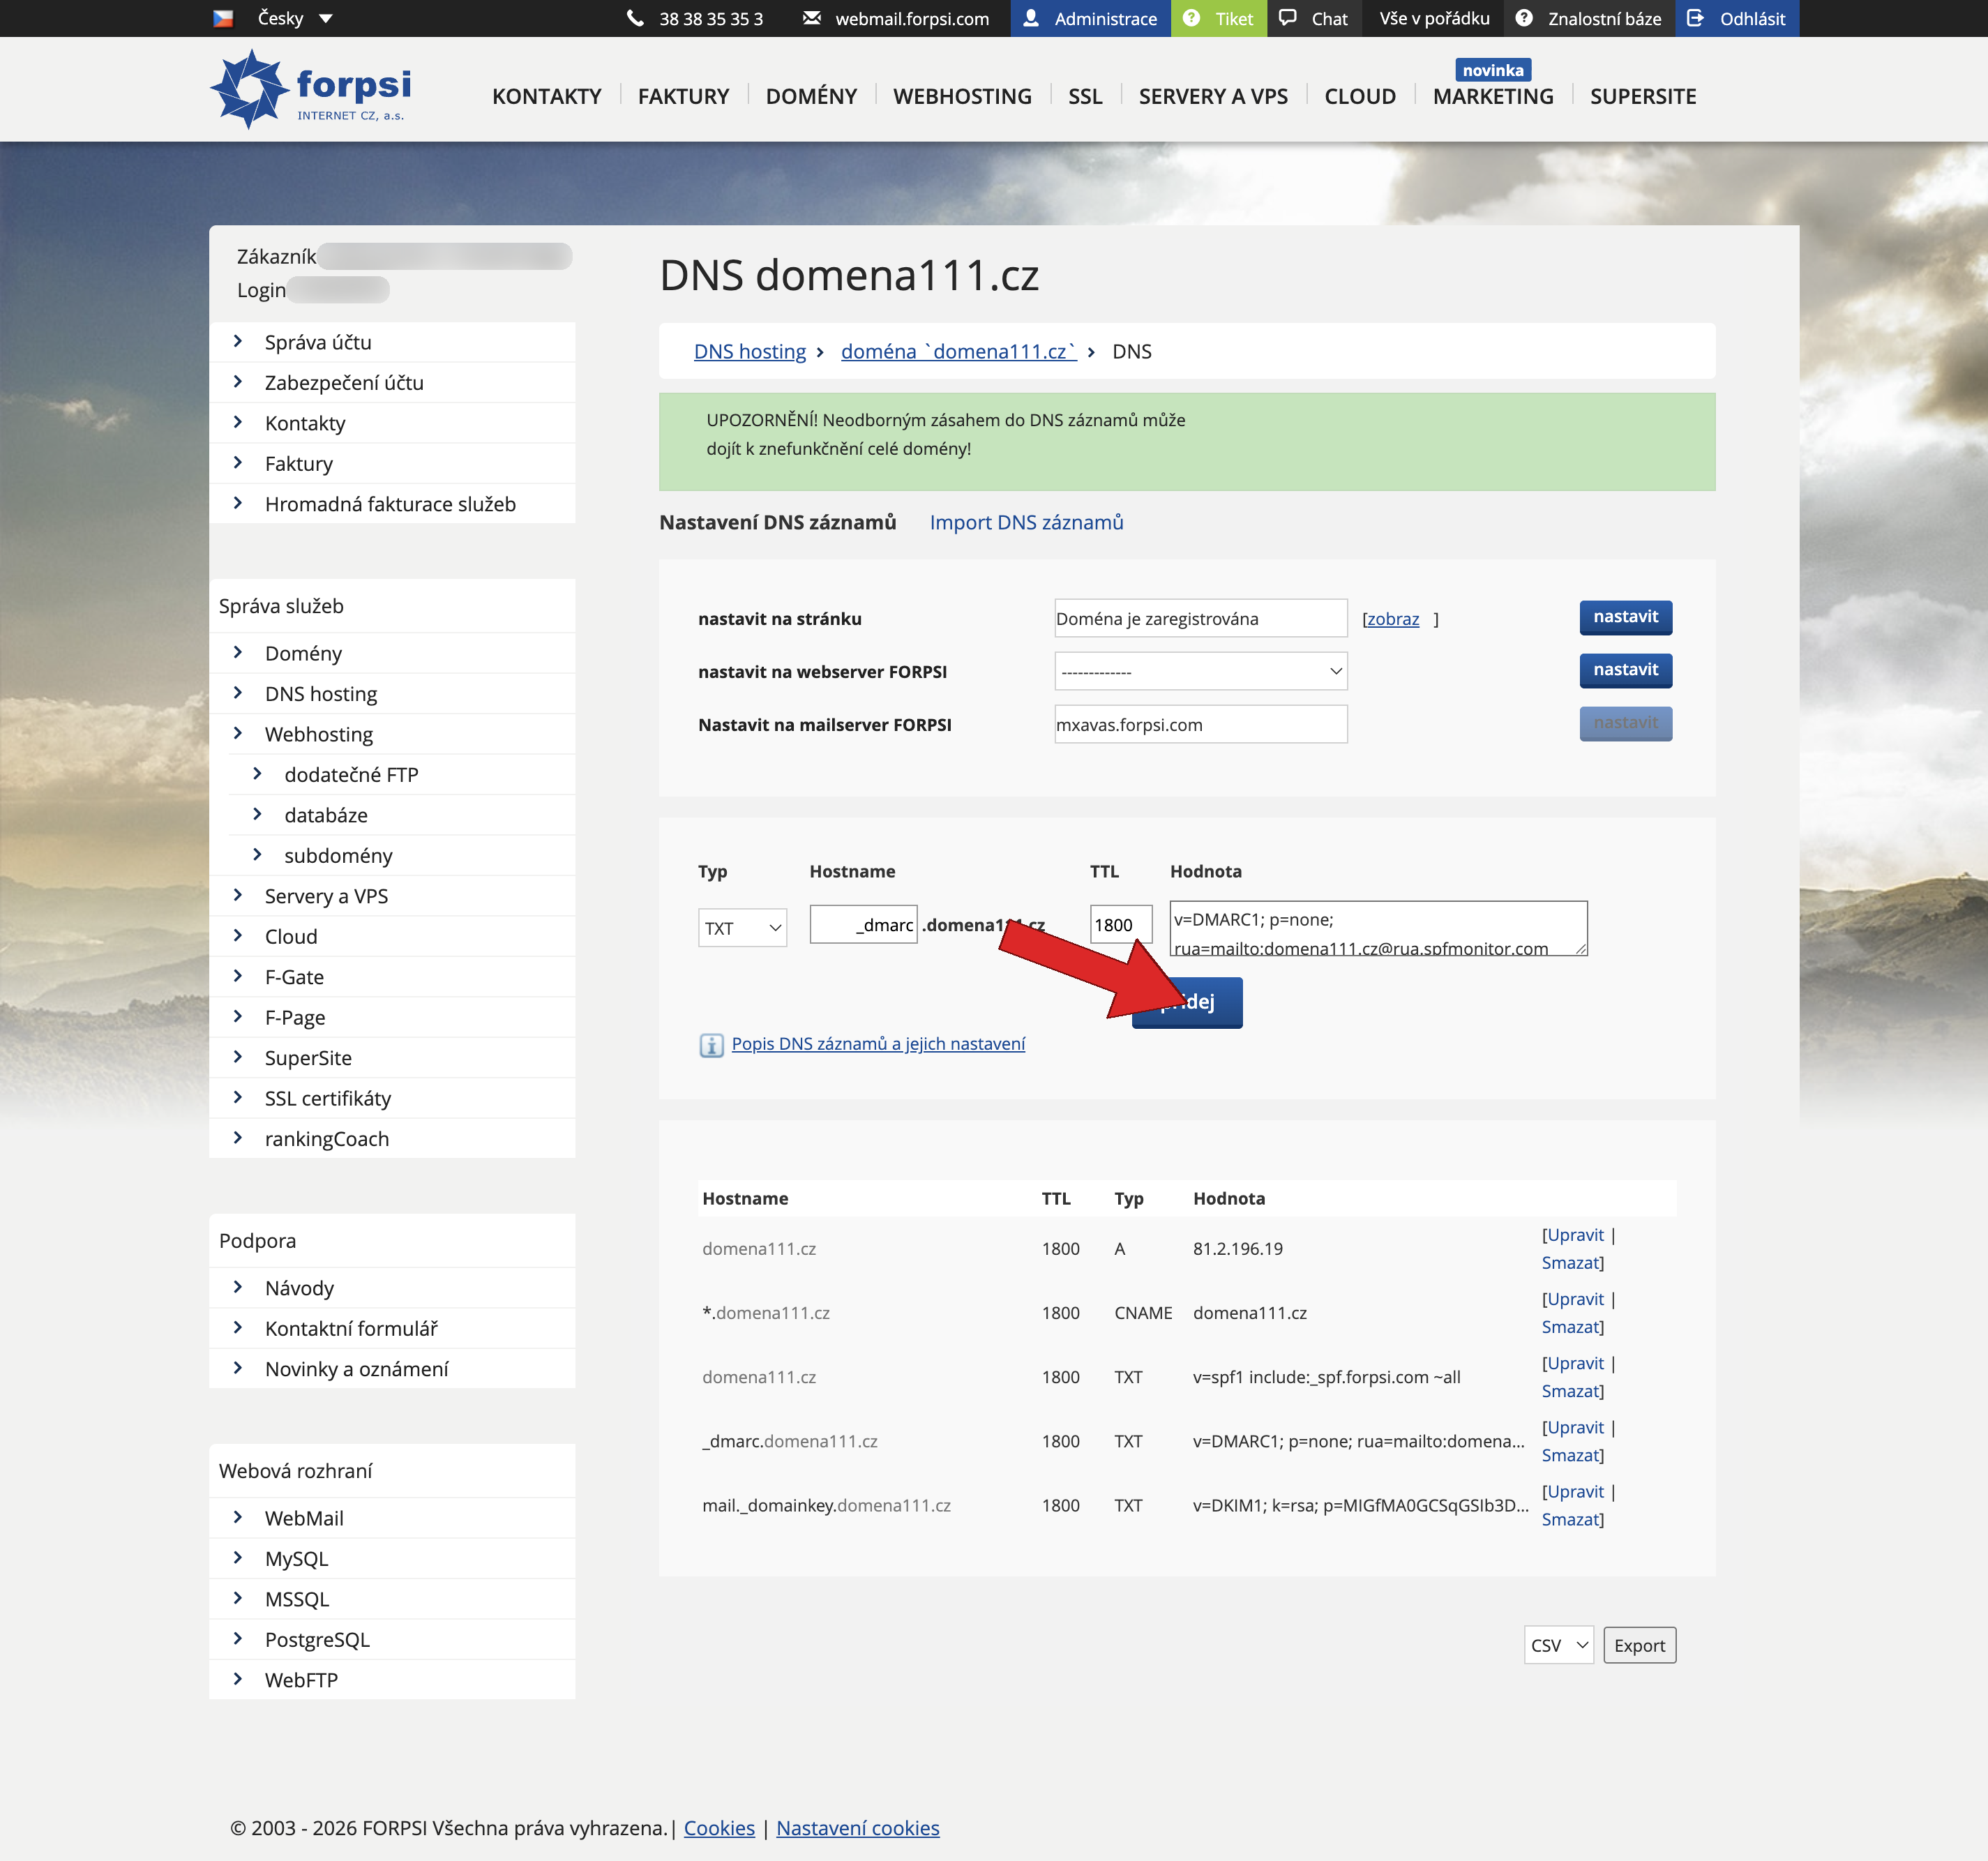
Step 4: Create the DMARC record
Fill in the form:
| Field | What to enter |
|---|---|
| Type | select TXT |
| Host name | _dmarc |
| TTL | default 1800 is fine |
| Value | DMARC policy (examples below) |
You can build the record using our DMARC Generator. We recommend starting with the none policy — it only collects reports without affecting delivery:
v=DMARC1; p=none; rua=mailto:your-domain.com@rua.spfmonitor.com
Replace your-domain.com with your actual domain. The address your-domain.com@rua.spfmonitor.com routes reports to SPF Monitor, which processes them automatically — no need to parse XML manually.
Want reports on your own email as well? Add the address after a comma:
v=DMARC1; p=none; rua=mailto:your-domain.com@rua.spfmonitor.com,mailto:dmarc@your-domain.com
| Part | Meaning |
|---|---|
v=DMARC1 |
protocol version (required) |
p=none |
policy — none monitors, quarantine sends to spam, reject rejects |
rua=mailto:... |
where to send aggregate reports |
Once you've verified that all legitimate services pass SPF and DKIM checks, you can move to a stricter policy:
v=DMARC1; p=reject; rua=mailto:your-domain.com@rua.spfmonitor.com
More about DMARC policies: What is DMARC.
 Source: https://admin.forpsi.com/domain-dns/dns-edit.php?id={id}
Click add. At FORPSI, the record is saved and activated immediately.
Step 5: Check the record in the table
After the page reloads, verify that a new row appears in the table: host name _dmarc, type TXT, value starting with v=DMARC1.
 Source: https://admin.forpsi.com/domain-dns/dns-edit.php?id={id}
Step 6: Verify the setup
DNS propagation usually takes up to 30 minutes. Then enter your domain in the domain check tool on SPFmonitor — it will verify DMARC along with SPF and DKIM.
Next steps
DMARC is the final piece of email authentication. Make sure you also have the other records set up:


