
How to Add a DKIM Record to DNS at FORPSI
Prerequisites
You need an active DNS hosting at FORPSI and access to the admin panel. Before you start, prepare your selector and public key — you'll find both in the settings of your email service (Google Workspace, Microsoft 365, etc.). Where to look is described in How to Set Up DKIM. If you're unfamiliar with DKIM, start with What is DKIM and How Does It Work.
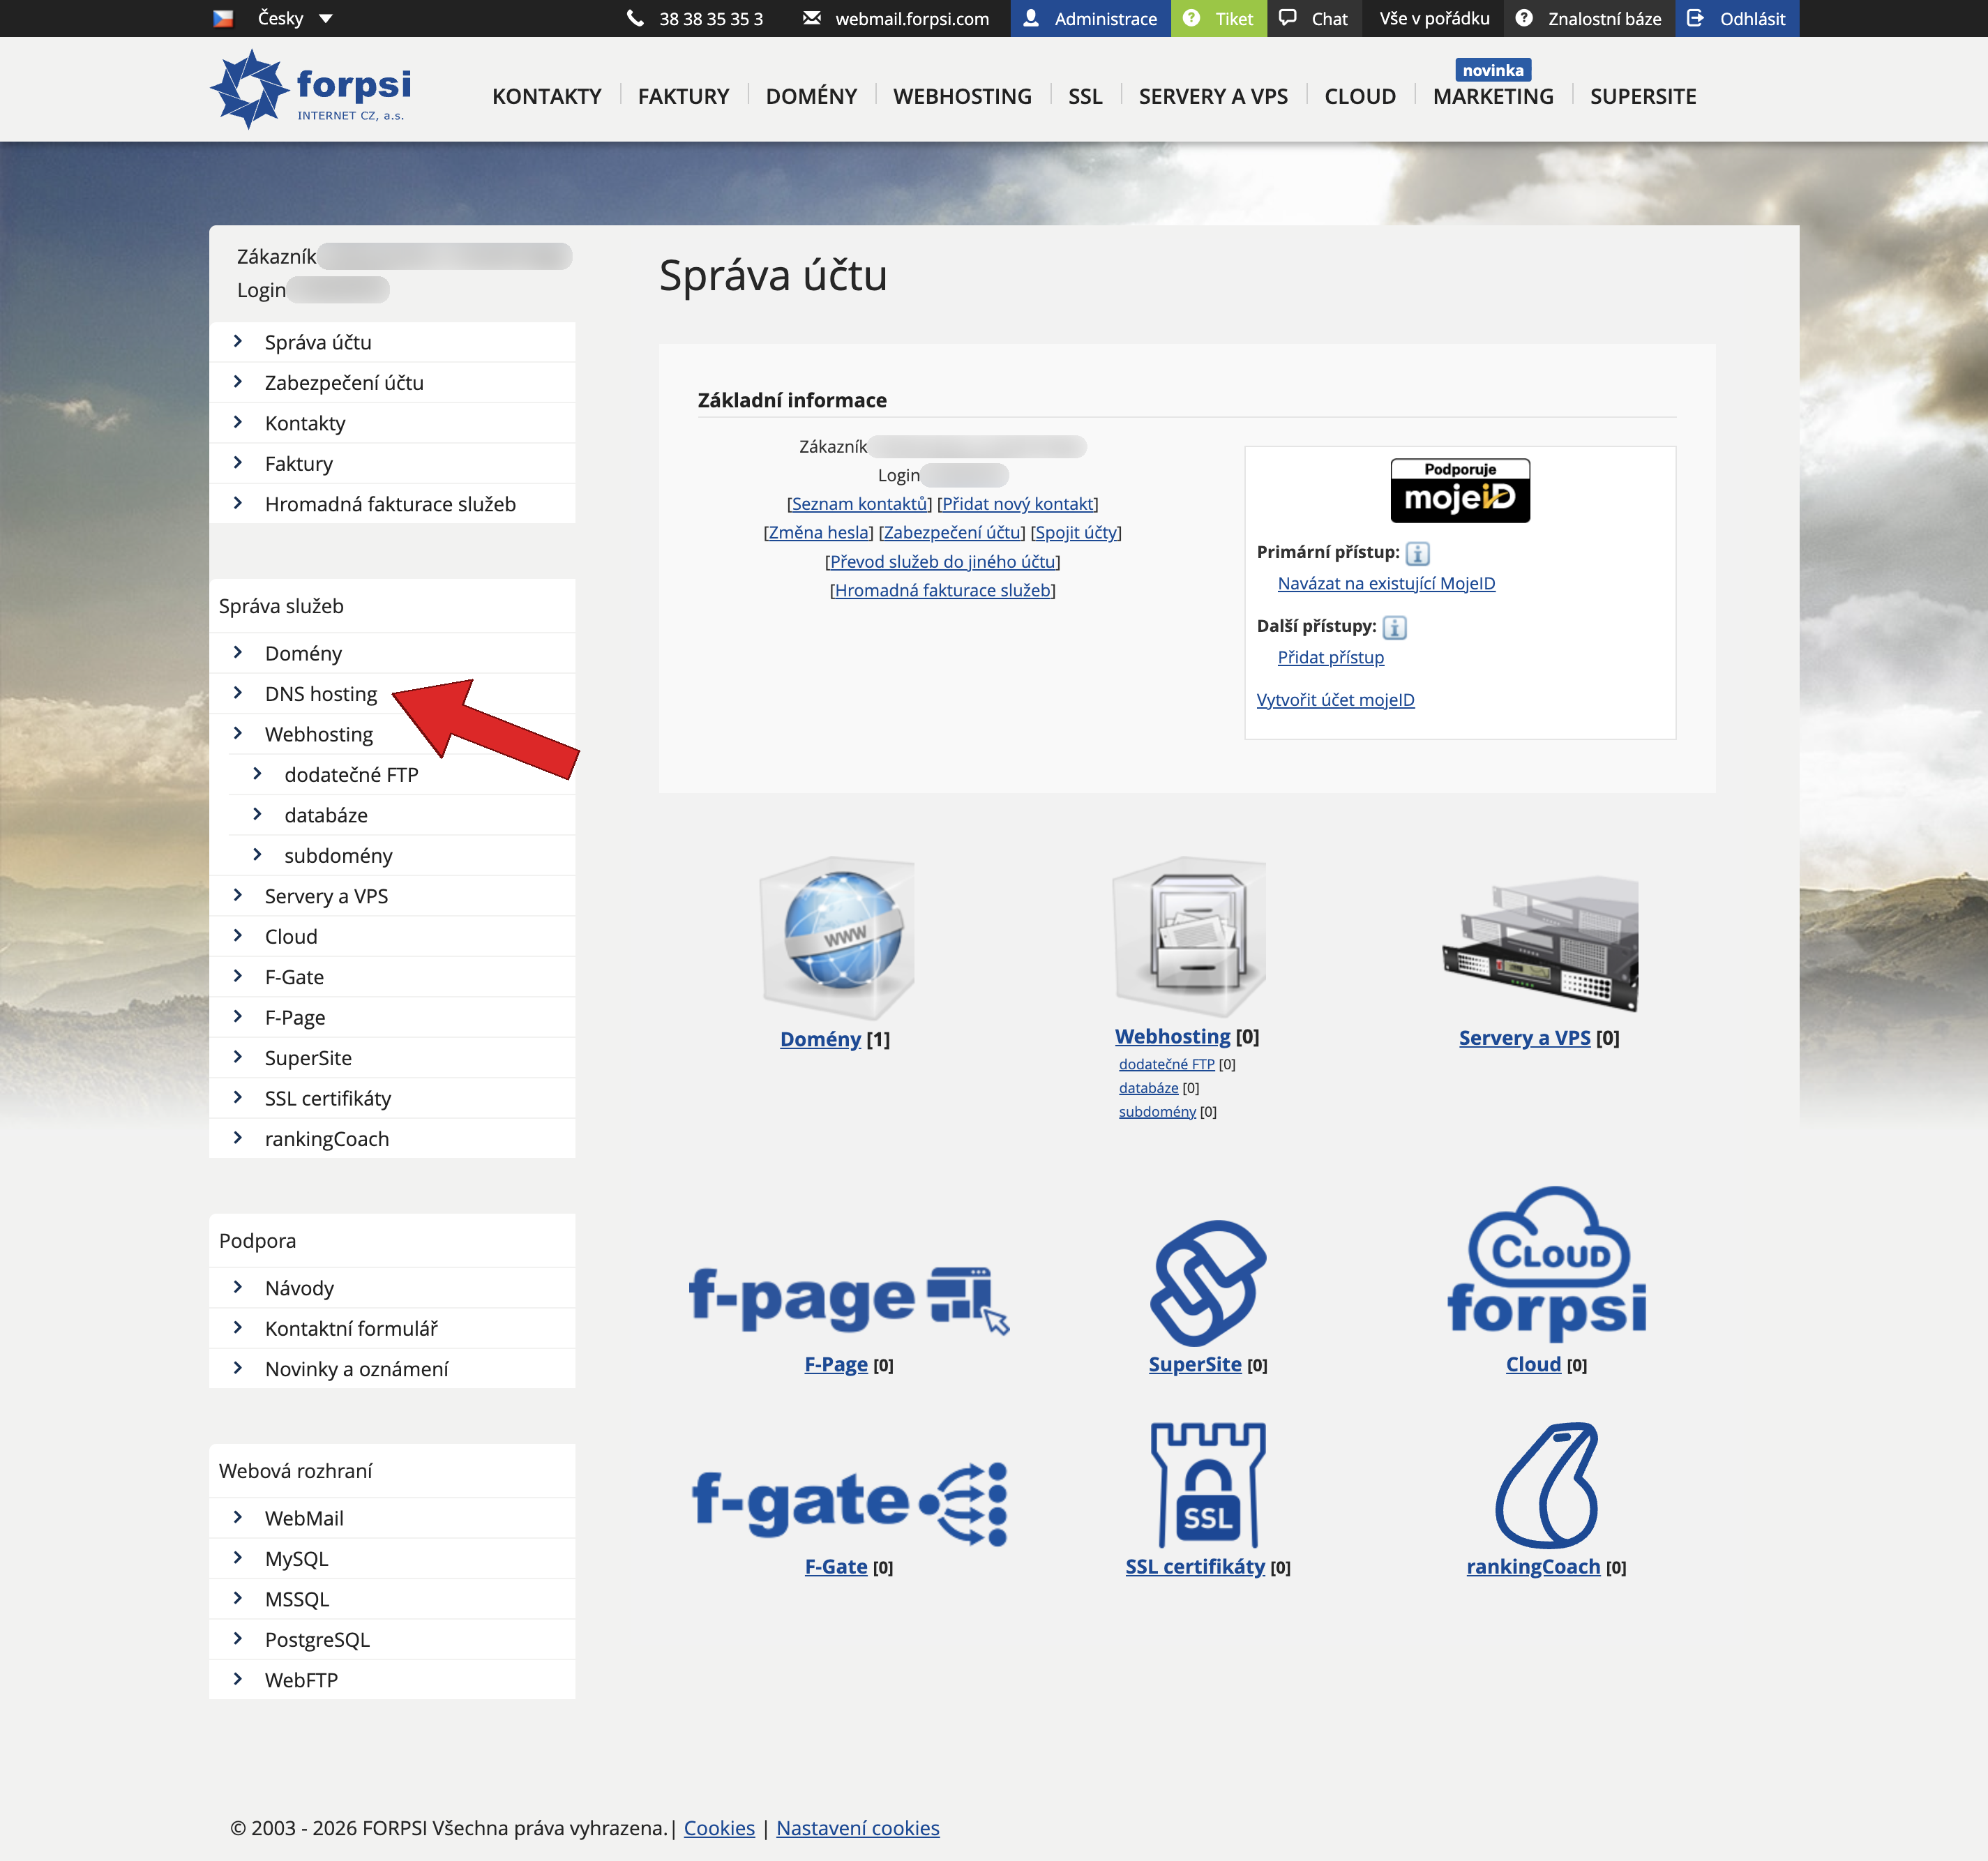
Step 1: Log in to the admin panel
Open admin.forpsi.com and log in. You will see the Account administration page with an overview of your services. In the left menu under Services administration, click DNS hosting.
 Source: https://admin.forpsi.com/
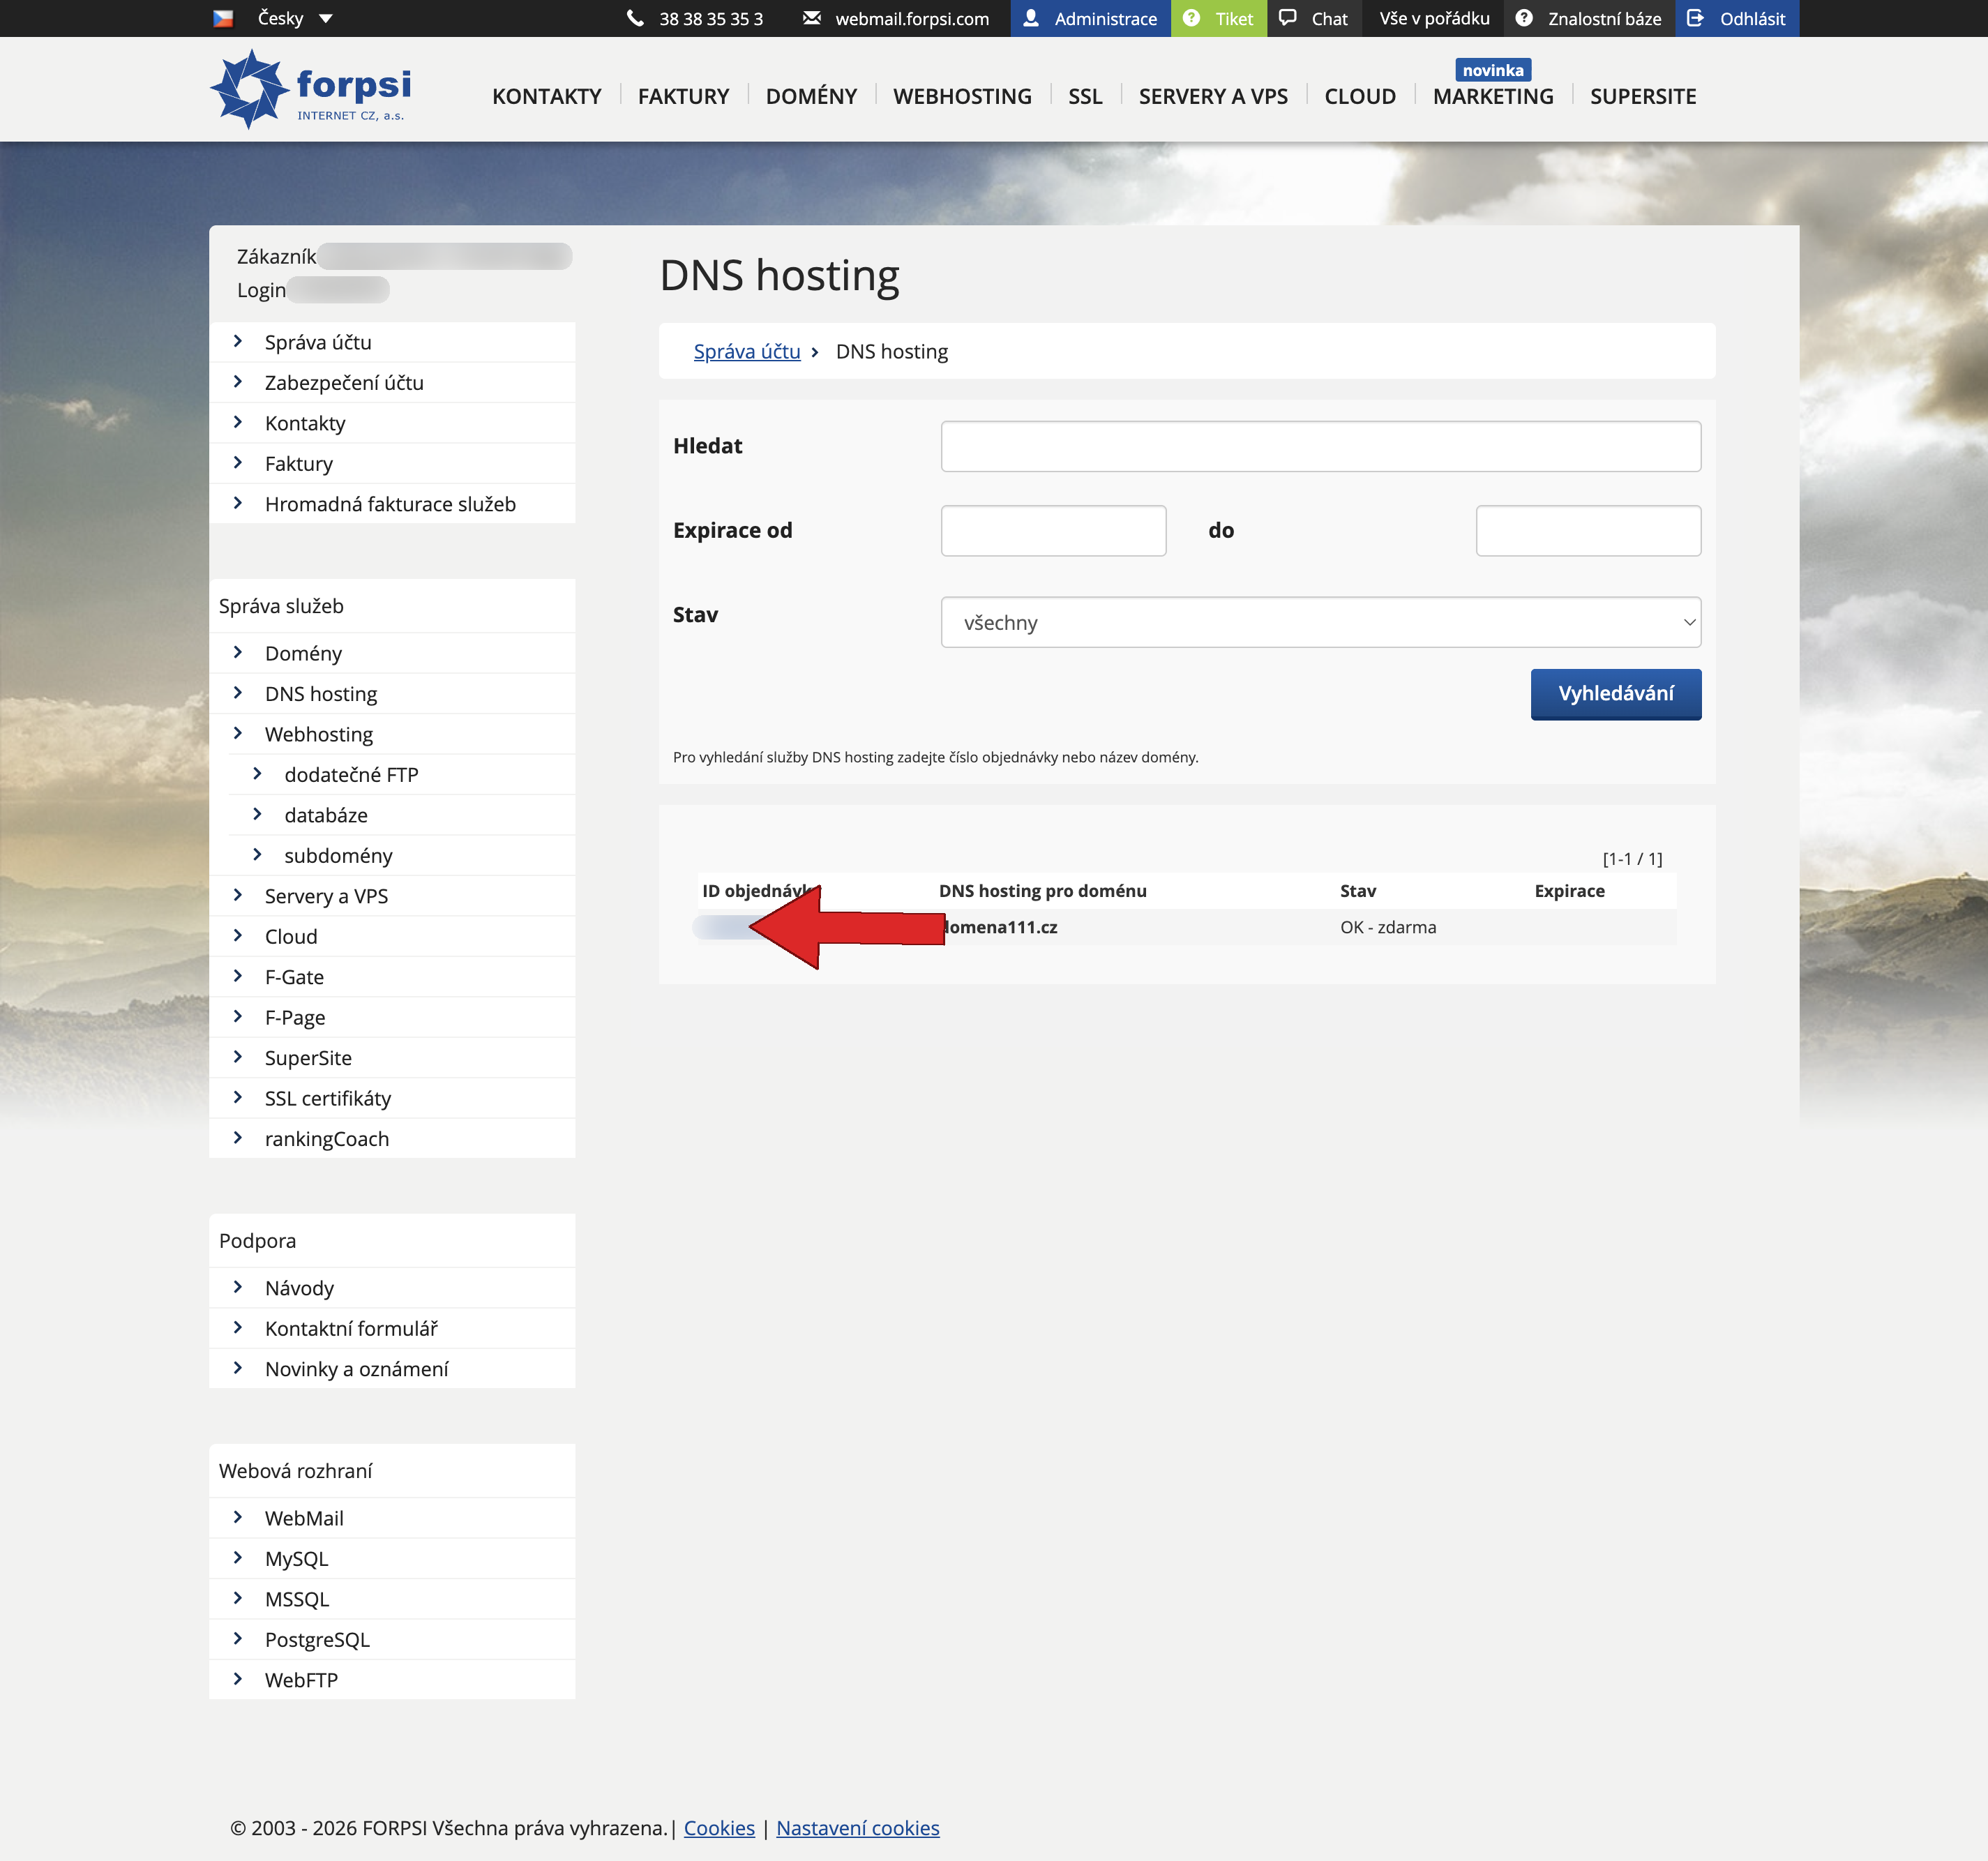
Step 2: Select your domain
On the DNS hosting page, click the order number next to the domain you want to add the DKIM record to.
 Source: https://admin.forpsi.com/domain-dns/dns-list.php
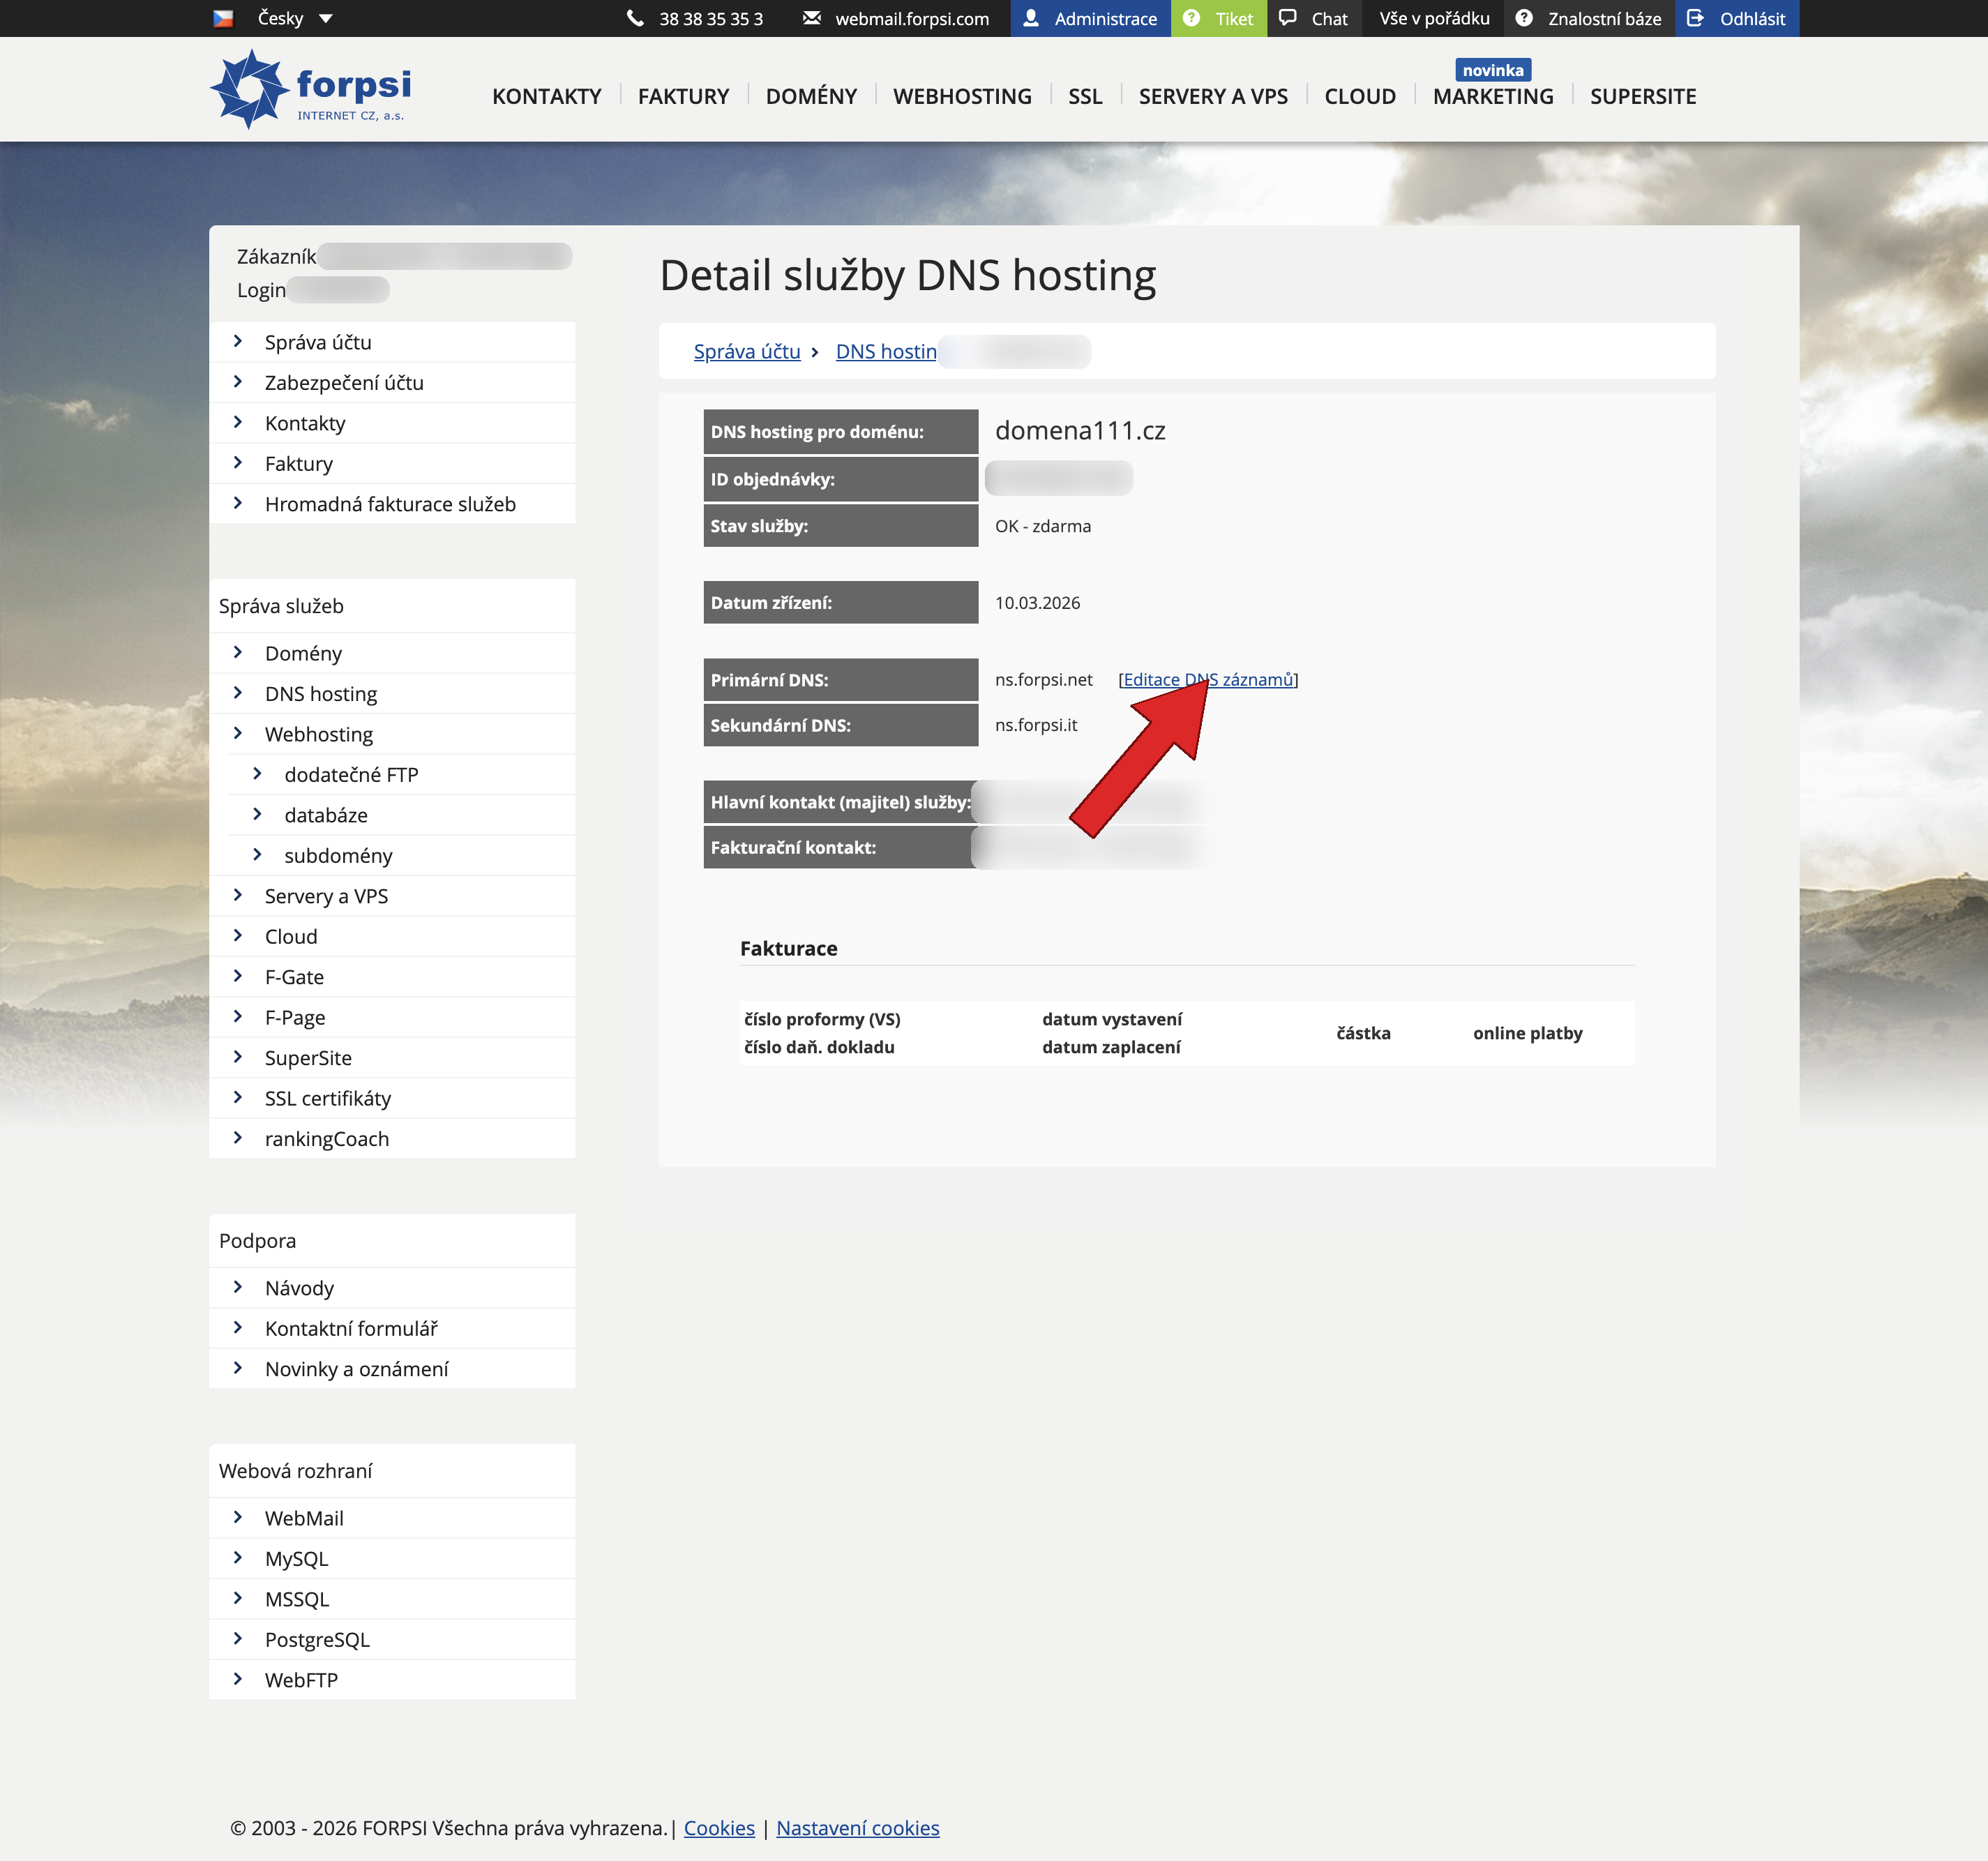
Step 3: Go to DNS record editing
On the DNS hosting service detail page, click the Edit DNS records link next to Primary DNS.
 Source: https://admin.forpsi.com/domain-dns/dns-detail.php?id={id}
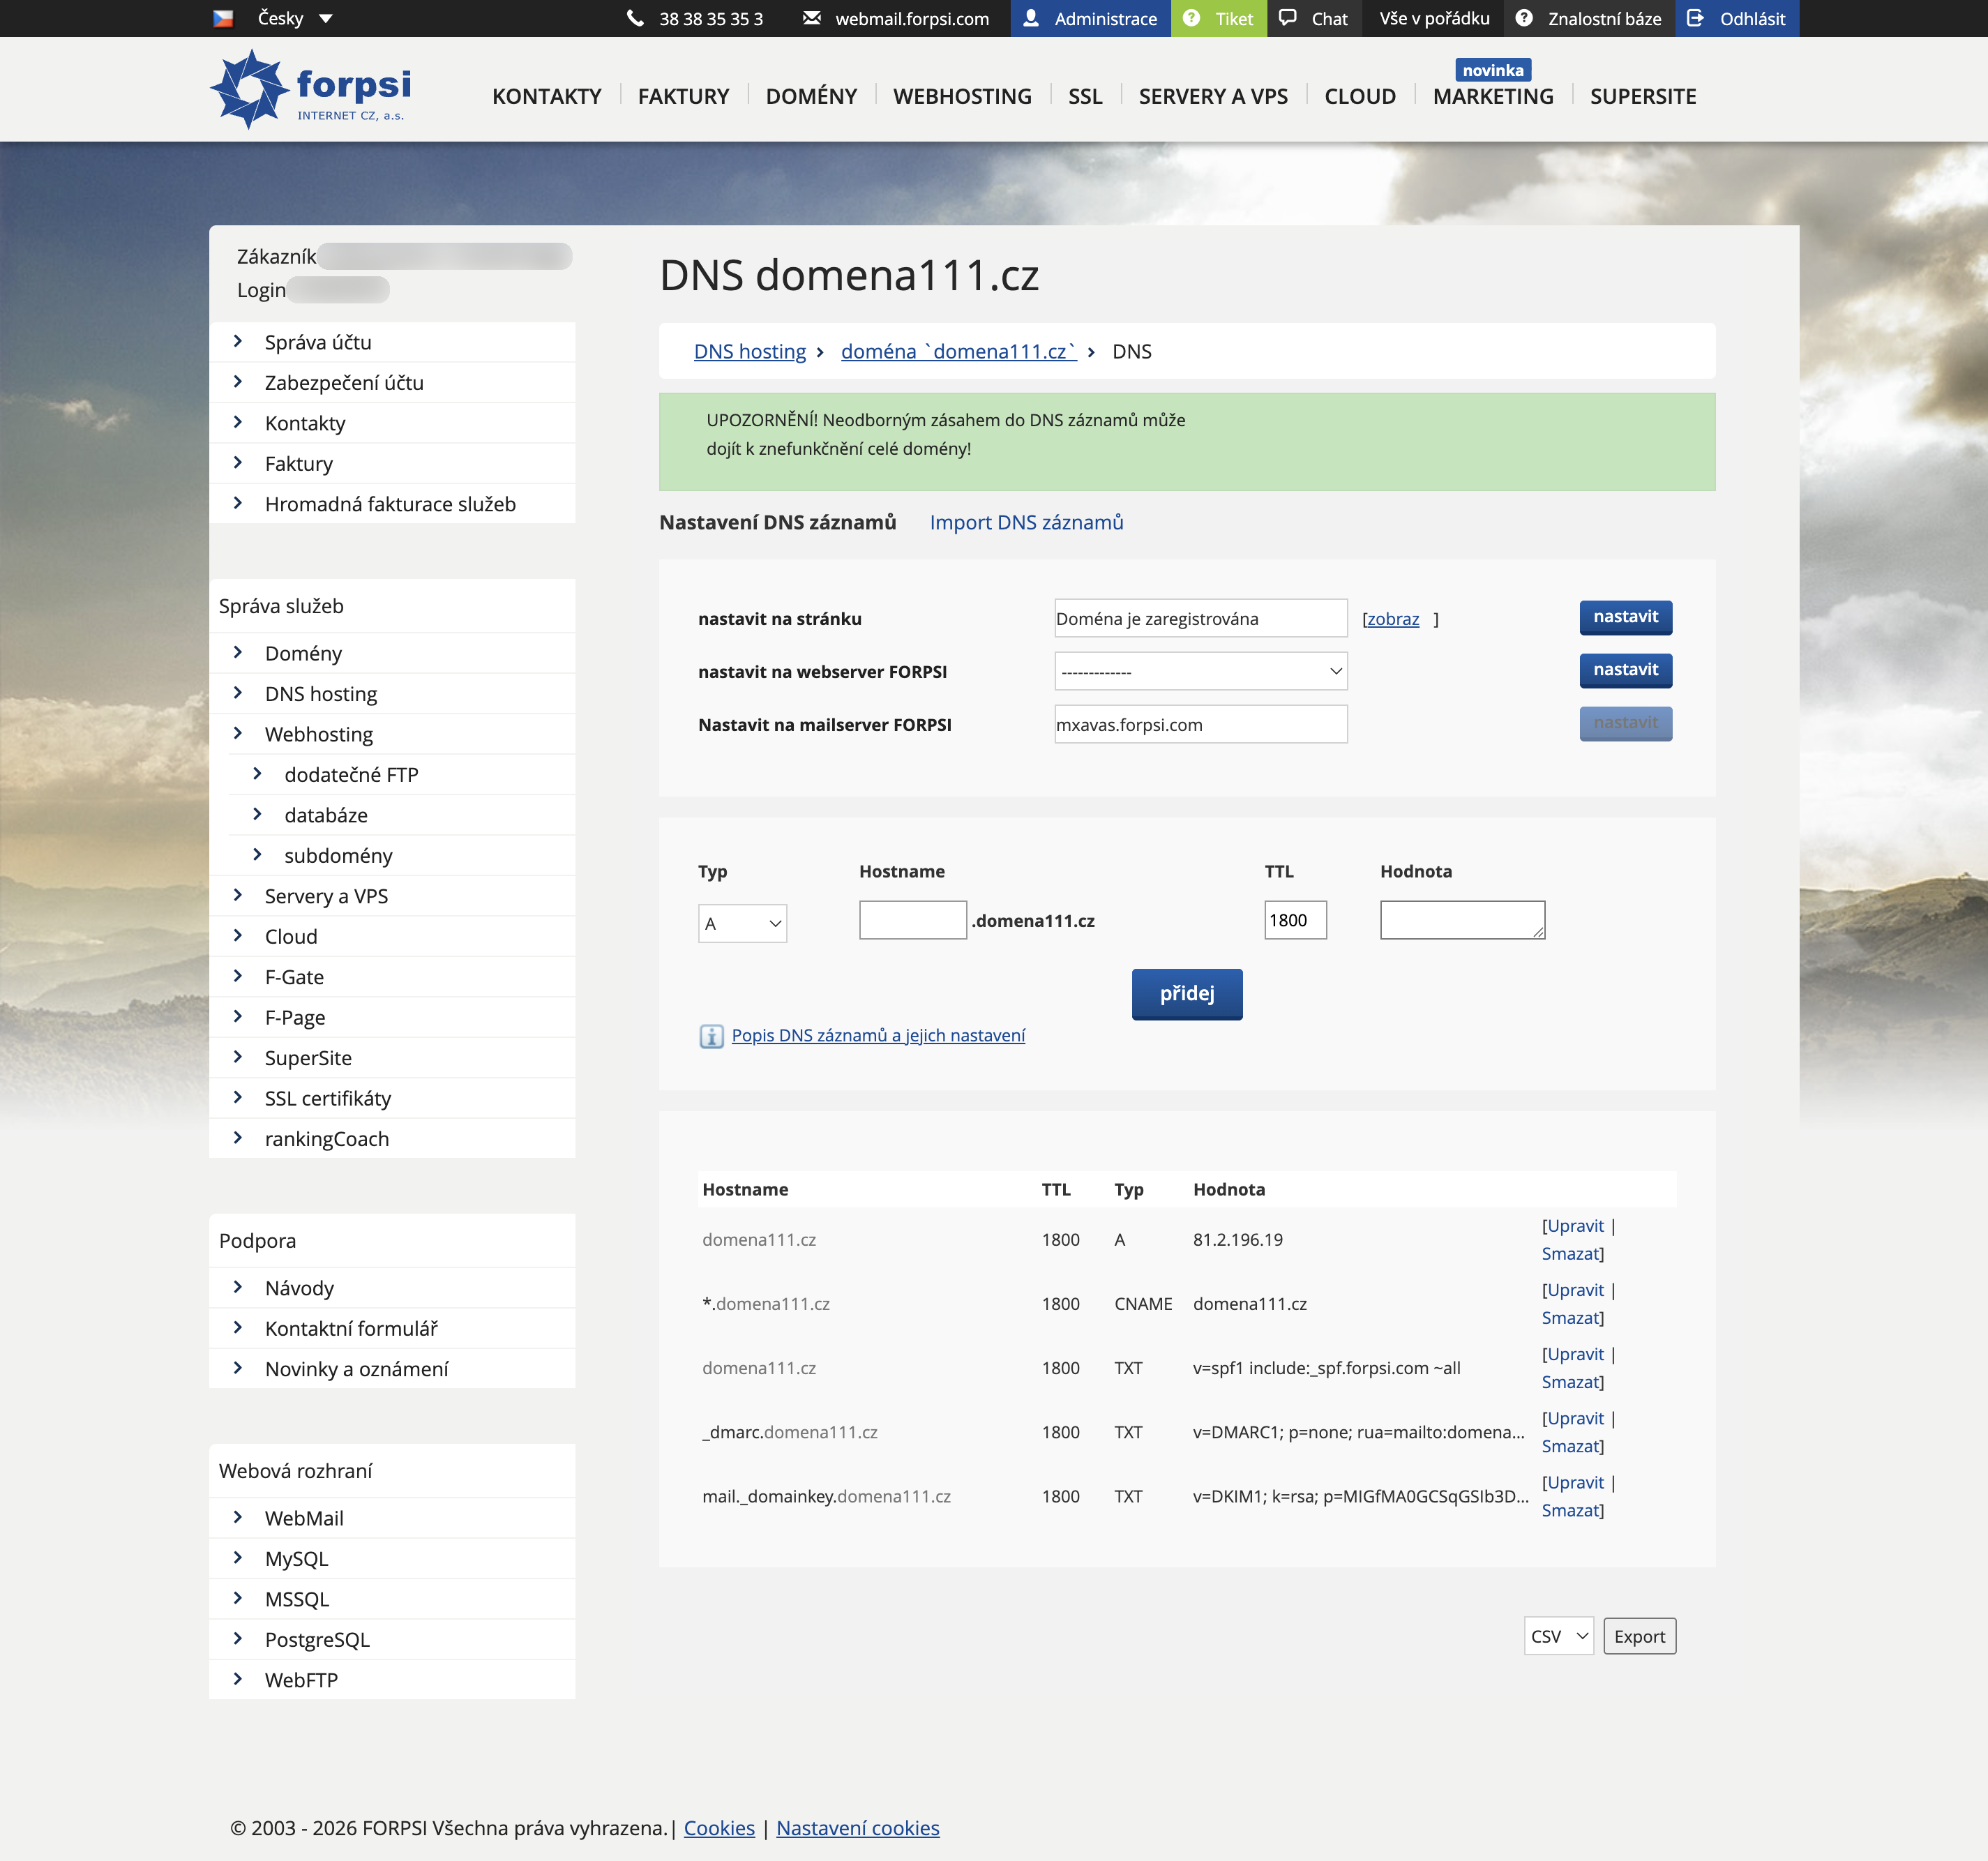
You will see a form for adding new records and a table of existing ones.
 Source: https://admin.forpsi.com/domain-dns/dns-edit.php?id={id}
Check whether a record with the same selector (e.g. google._domainkey) already exists — if so, edit it instead of creating a new one.
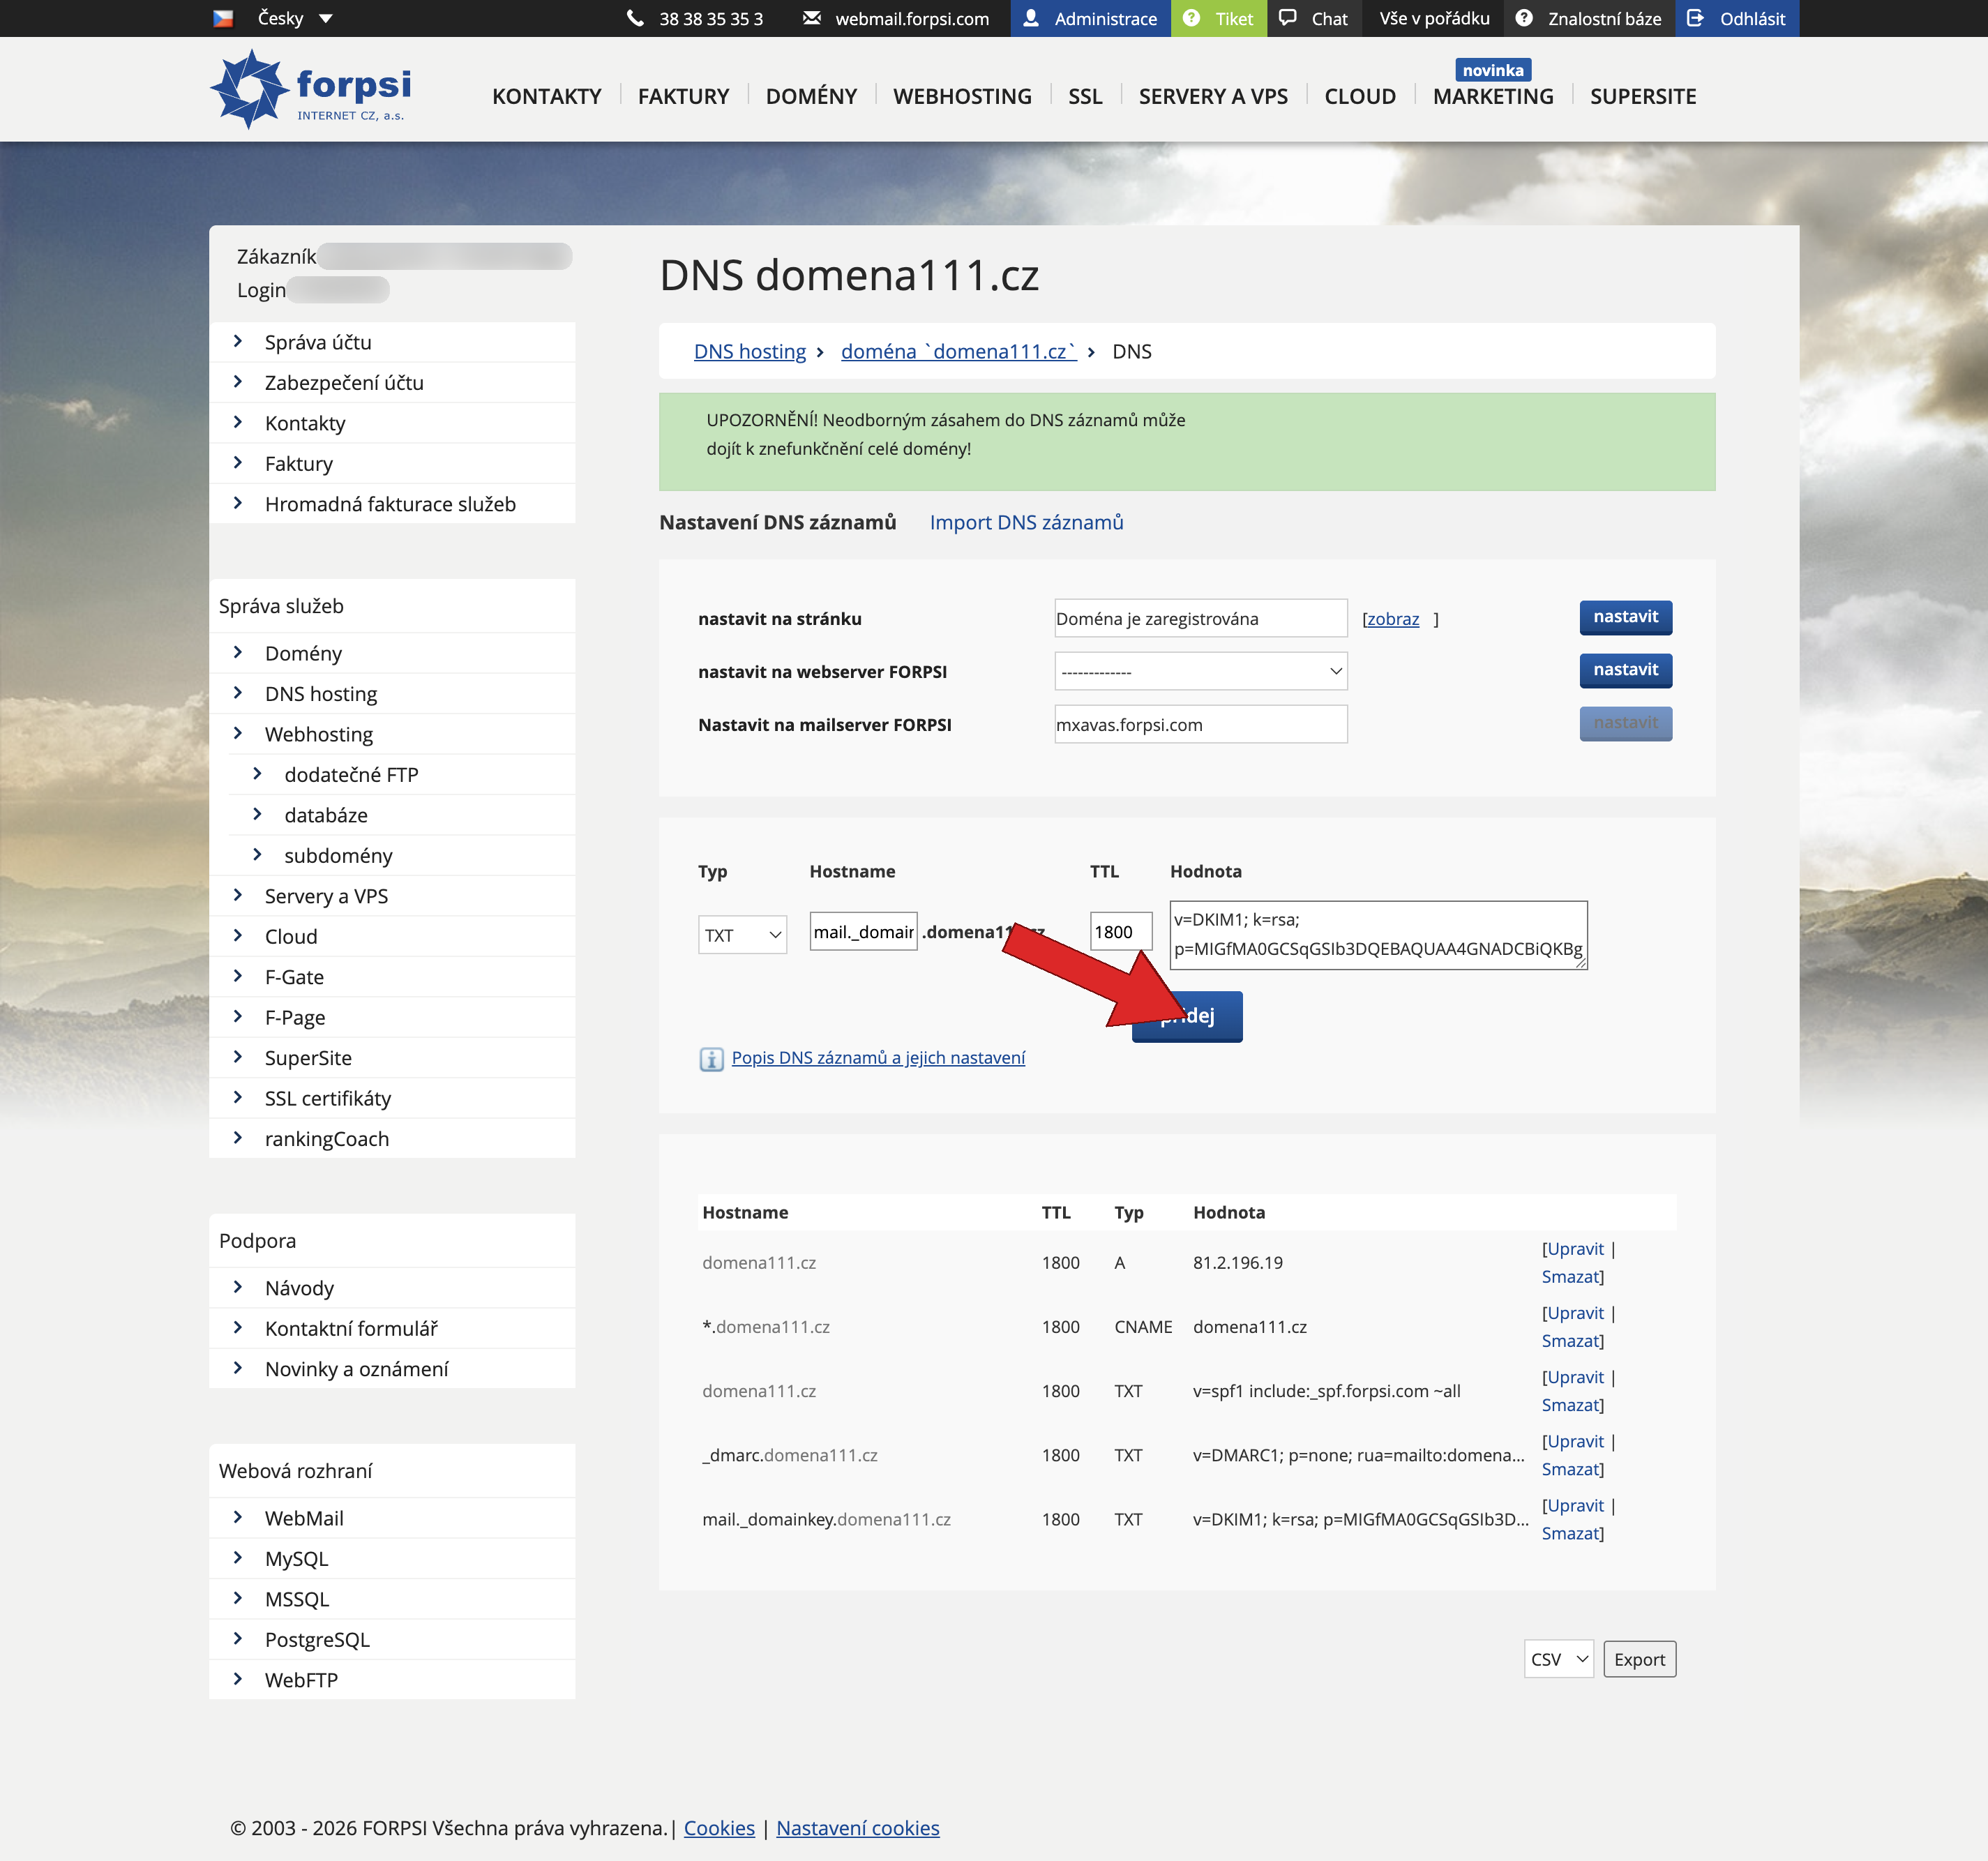
Step 4: Create the DKIM record
Fill in the form for a new record:
| Field | What to enter |
|---|---|
| Type | select TXT |
| Host name | {selector}._domainkey (see below) |
| TTL | default 1800 is fine |
| Value | DKIM value from your email service |
Host name — selector
In the Host name field, enter the selector followed by ._domainkey. FORPSI automatically appends your domain suffix. Examples:
| Email service | Host name |
|---|---|
| Google Workspace | google._domainkey |
| Microsoft 365 | selector1._domainkey |
You'll find the selector in the DKIM settings of your email service. For an overview, see DKIM Selectors and our overview of Czech email service providers.
Value — public key
In the Value field, paste the entire DKIM value as displayed by your email service. To build the record from your public key, you can use our DKIM Generator.
v=DKIM1; k=rsa; p=MIIBIjANBgkqhki...
Do not modify it — copy it exactly.
| Part | Meaning |
|---|---|
v=DKIM1 |
protocol version |
k=rsa |
key type |
p=MIIBIjAN... |
public key (Base64) |
 Source: https://admin.forpsi.com/domain-dns/dns-edit.php?id={id}
Click add. At FORPSI, the record is saved and activated immediately.
Step 5: Check the record in the table
After the page reloads, verify that the new row contains the correct host name (selector + ._domainkey) and type TXT with the DKIM value.
 Source: https://admin.forpsi.com/domain-dns/dns-edit.php?id={id}
Step 6: Verify the setup
DNS propagation usually takes up to 30 minutes. Then enter your domain and selector in the DKIM analyzer on SPFmonitor — it will verify that the public key is correctly published.
For details: How to Verify a DKIM Record.
Next steps
DKIM is the second part of email authentication. Make sure you also have the other records set up:


